
Do you ever look at fancy desserts in cafes and consider how to make them? Well, we do, too, especially those beautiful red velvet brownies! Crowned with a luscious white chocolate drizzle, these fudgy delights are an absolute dream for dessert.
On looking at these velvety textured brownies, we always think that making them won’t be any lesser than rocket science, but in reality, they aren’t that tough either!
With our easy red velvet brownies recipe, prepare for a new baking adventure that promises pure bliss. Let us blend the finest ingredients and create a flavor that makes you crave more.
Whether a seasoned baker or a rookie, these brownies are perfect for showcasing your culinary prowess. Besides, we will also be covering some basic baking mistakes and how to avoid them.
Red Velvet Brownies
As the name sounds, these brownies combine the delightful flavors of red velvet and brownies. This dessert makes up for a perfect fudgy treat to serve on Valentine’s Day. The brownies are full of delicious dark chocolate and topped with lots of white chocolate.
Red velvet has lately become a beloved classic in the world of desserts. Red velvet brownies are hard to resist due to their striking deep red color and a delicate hint of cocoa.
While traditional red velvet cakes have been stealing hearts for years, we’ll put a delightful twist on this classic in this recipe by turning it into rich and fudgy brownies. These decadent red velvet brownies will be perfect for every special occasion.
The Specialty of This Recipe

- Lovely vibe: These red velvet brownies are perfect for Valentine’s Day or dinner dates. They are super festive and the perfect dessert for your family and partner.
- Texture: These red velvet brownies are soft and have a fudgy texture with a perfectly crinkle top.
- Ease of making: These brownies never fail to impress and are easy to make.
- Tips & Tricks: We’ve included some baking tips that will help you achieve desired results, even if you’re a rookie in baking!
- Baking Mistakes: We’ve also shared some common baking mistakes and how to avoid them while making these delightful red velvet brownies.
Ingredients Required for Red Velvet Brownies
Items | Quantity |
1/2 cup (1 stick) | |
| 1 cup | |
| 2 | |
| Two teaspoons | |
| One tablespoon | |
| 1/4 cup | |
| 1/8 Teaspoon | |
| 1/2 teaspoon | |
| 3/4 cup | |
| 1/2 cup |
Some key ingredient notes for this red velvet brownie recipe are detailed below.
- Eggs: Take them out of the fridge for at least an hour before baking.
- Dark chocolate: We recommend dark chocolate on the sweeter side, e.g., 54.5%, and therefore not too bitter for the best results.
- Cornstarch: We use cornstarch as it breaks down the gluten in the flour, thus making for a softer and fudgy brownie.
- Cocoa powder: You should use high-quality Dutch-process cocoa powder for the best flavor; Valrhona’s cocoa powder is among the best in the market.
- Vegetable oil: These brownies are made with vegetable oil. Use, for example, canola oil or sunflower oil.
- Red Gel Food Coloring: We recommend using an extra red gel color. Gel color gives a more intense color and does not add excess liquid to the batter compared to liquid food color. We recommend using Sugarflair Velvet Red Gel Color for best results.
Red Velvet Brownies: Common Baking Mistakes to Avoid

Mistakes are fine as long as you’re learning something from them. Although you wouldn’t want to make mistakes if you’re trying to make these red velvet brownies for a special occasion, here is a list of some common baking mistakes and how you can avoid them for good:
- Overmixing: Vigorous mixing develops gluten, leading to dense and chewy results. Mix until just combined for tender baked goods.
- Opening the Oven Door: Avoid the temptation to peek too often; it releases heat and can cause cakes to collapse or cookies to deflate.
- Using Expired Leaveners: Baking powder and baking soda lose potency over time, resulting in flat and lifeless bakes. Check their effectiveness before use.
- Incorrectly Measuring Flour: Scooping directly from the bag compacts the flour, leading to dry and heavy cakes. Instead, spoon the flour into a measuring cup and then level it off.
- Not Preheating the Oven: Ensure your oven is fully preheated before baking. A cold oven will affect the rise and texture of your creations.
- Overbaking: Keep a close eye on your bakes and remove them from the oven once they are done. Overbaking can dry out delicate treats like cookies and muffins.
- Substituting Ingredients Indiscriminately: While some substitutions work well, others can drastically alter the outcome. Understand the role of each ingredient before making swaps.
By avoiding and learning from these common mistakes, you’ll be well on your way to becoming a baking expert. Remember that even if something goes wrong, it’s all part of the learning process!
Red Velvet Brownies: Step-By-Step Guide
Step 1: Preparation

Preheat the oven to 350 degrees Fahrenheit (175 degrees Celsius). Line an 8×8-inch baking dish with parchment paper, providing an overhang on all sides for easy removal.
Step 2: Mixing the Wet Ingredients

Whisk the melted butter and granulated sugar in a large mixing basin until completely blended. Add the eggs one at a time, thoroughly mixing after each addition. Incorporate the pure vanilla essence and red food coloring to give your batter its trademark brilliant color.
Step 3: Incorporating the Dry Ingredients

Sift in the cocoa powder, salt, and all-purpose flour. Gently mix the dry ingredients into the wet until they’re just combined. Be cautious not to overmix; we want that delicious, fudgy texture to remain.
Step 4: Final Touches

Finally, fold in the semi-sweet chocolate chips or pieces and stir in the white vinegar. The chocolatey richness will elevate your Red Velvet Brownies to new heights!
Step 5: Baking Time
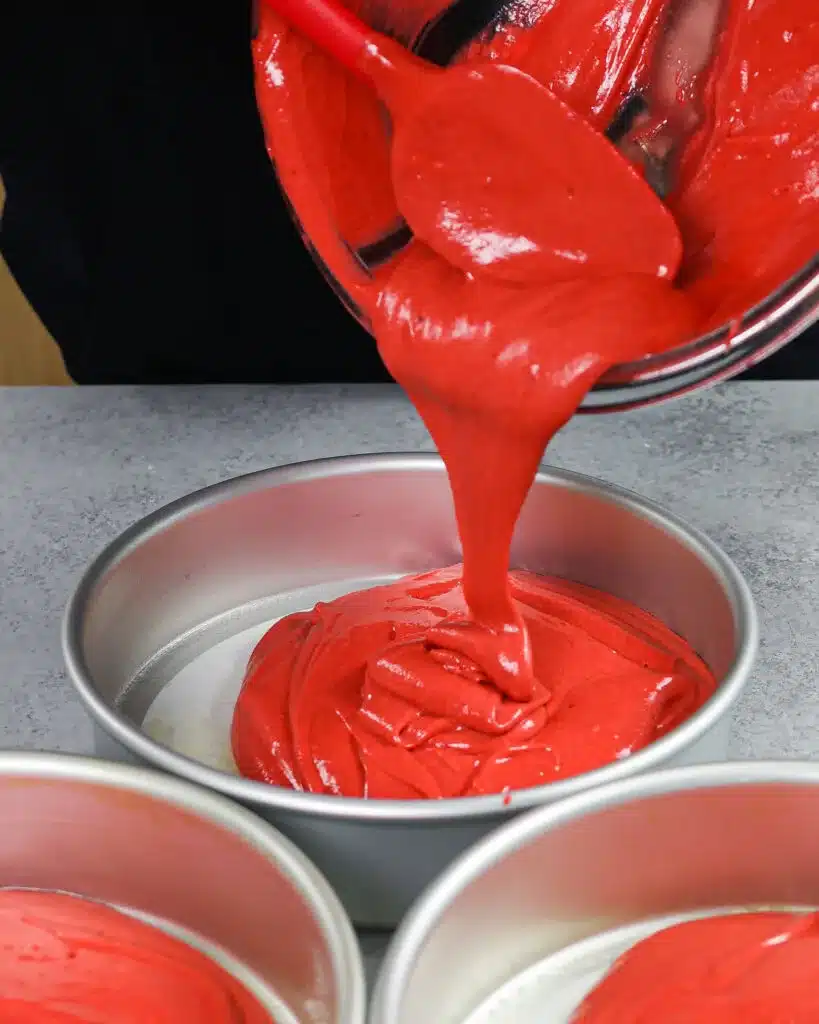
Pour the batter into the prepared baking pan and distribute evenly. Bake for 20-25 minutes, or until a toothpick inserted into the center emerges with a few moist crumbs. Remember that you want your brownies to be moist and chewy rather than dry.
Step 6: Let it Cool and Serve

Remove the pan from the oven and let the brownies cool in the pan for about 10 minutes before serving. Then, using the overhang of the parchment paper, take the brownies from the pan and lay them on a wire rack to cool fully. The finest part is yet to come: slicing and serving!
Some Expert Baking Tips
- Use a kitchen scale: Make sure the default setting on your kitchen scale is in grams. It is the most precise way of measuring your ingredients; therefore, we highly recommend using a kitchen scale.
- Don’t overmix your batter: Always use a spatula to give it one final gentle fold together after mixing everything. This ensures everything at the bottom of the mixing bowl has been mixed into the batter.
- Light vs. dark baking pans: Always try to use an aluminum baking pan. Grease it with butter and line it with baking paper on the bottom. Aluminum pans attract less heat due to being light in color. That means it bakes more gently, resulting in a softer cake. Using a black baking pan attracts a lot more heat, giving a darker crust, which can result in a dryer cake.
- Experiment with Frosting: While these brownies are fantastic, add a cream cheese frosting layer for an extra decadent experience. The tanginess of the cream cheese perfectly complements the sweetness of the brownies.
- Go Nuts: Add chopped walnuts or pecans to the batter if you enjoy crunch. The nuts will add a delightful texture and enhance the overall flavor.
- Gluten-Free Option: If you prefer gluten-free treats, substitute the all-purpose flour with a gluten-free blend. The result will still be as delicious as you intended it to be.
The Ultimate Dessert Experience
From the first bite of these red velvet brownies, you’ll experience a wonderful harmony of flavors. The cocoa offers a subtle chocolate taste, while the red food coloring elevates the visual appeal of this wonderful dessert. The soft, chewy texture and gooey chocolate chunks will make you crave more.
You can get more creative with your brownies by adding a cream cheese frosting swirl on top or a dusting of powdered sugar. Red velvet brownies are a delightful treat, but you can take them to the next level by serving them warm with a scoop of vanilla ice cream – a perfect marriage of contrasting flavors!
Conclusion
Baking is no less than a craft; it is a beautiful journey of discovery. The more you explore and experiment, the more rewarding it will become. With the mix of the right techniques, quality ingredients, and a sprinkle of creativity, you can create delicious lip-smacking masterpieces that will leave long-lasting impressions on your loved ones.
Red velvet brownies are not just a dessert but a whole experience that offers a fusion of flavors and textures. These homemade brownies are perfect for any special occasion and a sweet treat on a random Friday night.
Gather your ingredients, preheat the oven, and let’s create some mouthwatering red velvet brownies. Remember that the true beauty of basking lies in the journey — from mixing the bowl to the oven and tasting ecstatic brownies. Happy Baking!
Frequently Asked Questions
Instead of Dutch-Processed Cocoa Powder, Can We Use Natural Cocoa Powder?
Yes, you can use natural cocoa powder in this recipe, but remember that it may result in a slightly different taste and color. Dutch-processed cocoa powder is usually preferred in Red Velvet recipes as it is less acidic and contributes to the dessert’s signature red hue.
Can I Freeze Red Velvet Brownies?
Absolutely! Red Velvet Brownies freeze well and can be stored in an airtight container or freezer bag for up to three months. Thaw them at room temperature before indulging in their delightful goodness.
Can I Replace the White Vinegar with Apple Cider Vinegar?
Yes, you can use apple cider vinegar as a substitute for white vinegar since both are acidic and help the brownies rise. The slight difference in taste won’t significantly affect the overall outcome. However, remember that apple cider vinegar may leave a slight flavor while doing this.
How Do I Know When My Brownies Are Ready?
You’ll know the brownie is done when the brownie has just been set. When you take the brownies out of the oven, insert a butter knife, and if it has wet batter on it, give it five more minutes, but if it has some moist crumbs on the knife, it’s done.
How to Store Red Velvet Brownies?
You can store your red velvet brownies in the following two ways:
- At Room temperature: To keep these brownies fudgy, we recommend storing them at room temperature in an airtight container. To protect the edges from drying out, we recommend waiting until you’re ready to serve them to cut them.
- Inside Fridge: Most people love a cold brownie. It tightens up the texture of the brownies and makes them extra fudgy. Hence, it will be really good to make your brownies a day ahead of serving.


