Creating engaging play spaces for kids can feel overwhelming. Parents want something that keeps children’s attention while helping them learn, but store-bought options often come with hefty price tags. Plus, they might not fit specific needs or space constraints.
A DIY sensory table solves these problems perfectly. Anyone can build one that matches their budget, available space, and their child’s interests. It’s a simple project that offers big rewards in terms of child development and hours of focused play.
This article will show five easy-to-follow designs for DIY sensory tables to make at home. It will also include tips for sensory materials to fill them with and activity ideas to keep little ones engaged for months to come.
What Exactly is a Sensory Table?

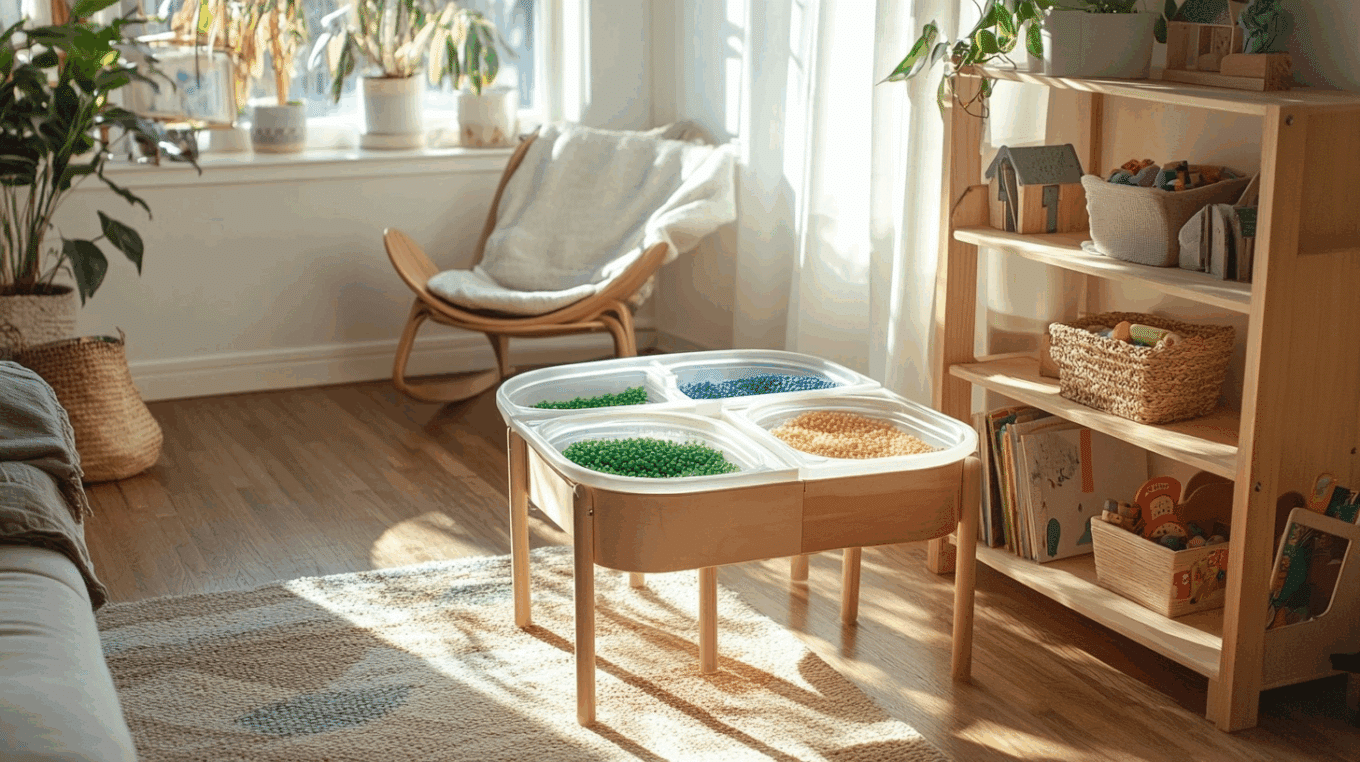
A sensory table is a play area where kids can touch, feel, and examine different things. It’s usually a table or box with sides that can hold things like sand, water, rice, or beans. Kids can put their hands in these materials and play with them using cups, spoons, or toys.
These tables help kids learn by using their senses – mostly touch, but also sight, smell, and sometimes even sound. When a child runs their fingers through rice or splashes in water, they’re finding out how things work in the world.
You might see sensory tables in schools, but many parents make them at home, too. A DIY sensory table can be as simple as a plastic bin on the floor or as fancy as a custom-built table with storage.
Kids who play at sensory tables often get better at using their hands.
They also learn words to describe what they feel, like “wet,” “soft,” or “bumpy.” Most of all, sensory tables are fun! Kids can spend hours playing, pouring, filling, and moving things around. This kind of play helps them grow their brains while they’re having a good time.
Tools and Materials Required
Gathering all necessary tools and materials before starting this DIY sensory table project will make the construction process much smoother. The right equipment ensures each step can be completed properly without interruptions.
This project creatively combines IKEA furniture pieces, converting them into a functional play space for children.
Parents will appreciate having everything ready before beginning, as it saves time and reduces frustration during the building process.
| Item | Purpose | Estimated Cost |
|---|---|---|
| IKEA SNIGLAR Changing Table | Base structure for the play table | $10 (used) or $35 (new) |
| IKEA BEKVÄM Spice Rack | Fills center gap between bins | $5 |
| IKEA TROFAST Bins (x2) | Sensory play bins | $6 ($3 each) |
| Wood Glue | For joining wood surfaces | $0 (borrowed) |
| Allen Wrench | To disassemble/reassemble screws | $0 (included with SNIGLAR) |
| Hand Saw | To cut wood and adjust pieces | $0 (borrowed) |
| Clamps or Heavy Books | To hold glued pieces in place | $0 (borrowed/home) |
| Baby Wipes | Clean excess glue drips | $0 (household item) |
| Pliers | For removing wooden pegs | $0 (borrowed) |
| Measuring Tape | Ensures accurate bin spacing | $0 (household item) |
Making Your DIY Sensory Table at Home Easily
Creating a DIY sensory table doesn’t need fancy tools or woodworking skills. Parents can convert simple items like old coffee tables, plastic storage bins, or bookshelf cubes into play stations kids love.
The process takes just an afternoon in most cases.
Even those who’ve never built anything before can follow these steps to craft a useful play space. This project saves money while giving kids a custom spot for hands-on learning and fun.
Step 1: Plan Your Bin Placement

Start by laying your TROFAST bins on top of the table to decide how you want them positioned. Flip the table over to inspect the underside; note the location of the central support beam. This beam limits bin placement to one direction, typically horizontal.
To ensure perfect alignment, use two identical objects (like Duplo blocks) on each side to help position the bins symmetrically. It’s a clever, no-tools-needed hack that gets the job done quickly.
Step 2: Mark the Cutting Area

Once the bins are lined up evenly, trace their outlines with a pencil to create a guide for cutting. Remove the bins; you’ll now have clean, pencil-drawn shapes where the bins will eventually sit. These outlines will help you make precise cuts.
Before cutting, use a drill to make pilot holes inside each shape. These holes let you insert the jigsaw blade without damaging the table surface. To avoid damaging your floor, prop the table on the bins while drilling.
Step 3: Cut the Bin Openings

Now that your pilot holes are in place, use a jigsaw to follow the pencil outlines carefully. Start by inserting the blade into one of the drilled holes and working your way around slowly. MDF is easy to cut but produces a lot of dust, so consider working in a ventilated area.
Each cut-out should pop out smoothly. Check the bin fit by sliding them into the new openings; if they sit snugly, you’re on track for a perfect DIY transfiguration.
Step 4: Sand and Smooth the Edges

After cutting, you’ll likely have rough edges around the openings. Use 320-grit sandpaper to smooth them down carefully. This not only gives the table a cleaner look but also ensures that the bins slide in and out effortlessly. Be sure to wipe away all the sawdust with a cloth or vacuum. Clean edges also help protect your child’s hands during play, so don’t skip this step; it makes all the difference in the final result.
Step 5: Assemble and Enjoy

Reassemble the table by securing any frames or panels you removed earlier. Slide the TROFAST bins into place, test their movement to ensure a smooth fit. You can now start using your new sensory table right away.
It doesn’t matter if you’re filling the bins with blocks, rice, or water beads; this table is ready for limitless hours of creative fun. Best of all, it’s a budget-friendly upcycle that looks adorable in any playroom.
For more detailed steps, check out the YouTube link below:
Benefits of Having a DIY Sensory Table
When kids play, they learn. A DIY sensory table offers so many good things for children and parents alike. These play spots do more than keep little hands busy – they help minds grow, too. The best part? You can make one that fits your needs without spending lots of money. Let’s look at why these tables are such great tools for kids of all ages.
- Kids learn through touch with these tables; feeling different stuff helps their brains grow.
- Making your table costs way less than buying one from a store.
- You can change the size to fit your space, and even small homes can have room for one.
- Parents can pick safe items for their kids to play with.
- The table height can be just right for your child’s size.
- These tables keep kids busy for a long time.
- You can switch out the items based on what your child likes most.
- Kids use their hands more, which helps them with writing later.
Activities Included in a Sensory Table

A DIY sensory table opens up a world of play options for children. Parents can fill these tables with so many different items that kids will never get bored. Rice and beans make great base fillers that little hands can scoop, pour, and sift through for hours.
Adding small toys to the mix creates instant, themed play. Plastic animals can turn the table into a farm or jungle. Toy cars convert it into a construction site with rice “dirt” to push around. Small kitchen tools like measuring cups, funnels, and spoons help kids learn about amounts and how things move.
Water play brings a whole new level of fun. Kids can float boats, test which items sink or swim, or add bubbles for a sudsy good time. Colored water teaches about mixing and color changes when it is poured between containers.
Seasonal themes work great, too. Fall leaves, pine cones, and acorns bring nature to their fingertips. Snow or ice in winter (real or fake) lets them feel cold textures. Beach sand and shells make summer last all year.
Finishing It Up
Building your DIY sensory table brings learning and fun together in one spot. This simple project gives children a place to examine textures, practice motor skills, and use their minds in creative ways.
Remember that the beauty of making your table is that you can adapt it to fit your space, budget, and your child’s interests. Start with basic fillers like rice or water, then branch out as you see what captures your child’s attention.
Ready to get started? Gather your tools, set aside an afternoon, and follow the steps we’ve outlined. Your kids will thank you with hours of engaged play and growth.
Why not take a photo of your finished table and the first activity you set up? We’d love to see your creations in the comments below!


