
Imagine you’ve cooked a delicious chicken dinner, but your family isn’t ready to eat yet.
You don’t want to serve cold, dry chicken, but you don’t want to overcook it. Does this sound familiar?
Keeping chicken warm in the oven without drying it out can be challenging.
But don’t worry—we’ve got you covered! In this ultimate guide, we’ll share simple techniques for keeping your chicken moist and flavorful, even when dinner is delayed.
From the ideal oven temperature to the best methods for sealing in juices, you’ll learn everything you need to know to serve a warm, juicy chicken every time.
So, let’s master the art of keeping chicken warm in the oven!
Methods to Keep Chicken Warm in the Oven
1. Conventional Oven

A conventional oven is a straightforward and reliable way to keep your chicken warm and ready to serve.
Preheat your oven to 200°F (93°C), typically the lowest temperature setting available.
Once the oven is heated, arrange the chicken pieces on a wire rack placed over a baking sheet.
This setup allows for proper air circulation around the chicken.
Leave space between each piece to avoid steaming, leading to soggy skin.
Periodically check on the chicken to ensure it stays warm without overcooking or drying out.
This method can keep your chicken warm and crispy for up to half an hour.
2. Toaster Oven

A toaster oven can be a convenient solution when you need to warm a smaller chicken batch.
Preheating the toaster oven to 200°F (93°C), just as a conventional oven.
Next, place the chicken pieces on a rack inside the toaster oven, ensuring a baking sheet is beneath to catch any drips.
To prevent the chicken from burning, loosely cover it with aluminum foil.
This method works well for keeping 2-4 pieces of chicken warm at a time, making it perfect for smaller gatherings or serving a few people.
3. Slow Cooker or Roaster
Slow cookers or roasters are your best bet when you need to warm a large quantity of chicken.
Start by preheating the appliance to 200°F (93°C). If your slow cooker or roaster has a rack, place it inside and arrange the chicken pieces on top, ensuring space between each piece for even warming.
If you don’t have a rack, you can still use the appliance, but be sure to rotate the chicken pieces periodically to ensure they warm up evenly.
Check on the chicken regularly to ensure it stays warm without drying out, especially around the edges.
This method is ideal for keeping a big batch of chicken warm without compromising its quality.
4. Chafing Dish
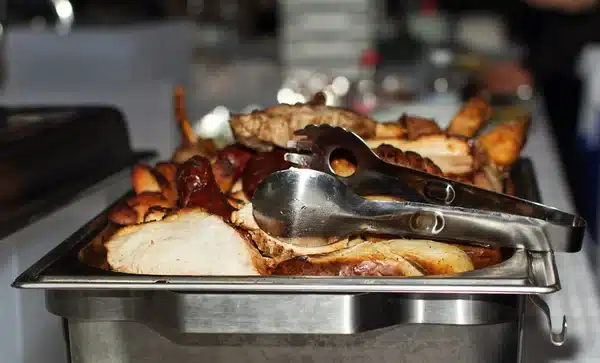
Chafing dishes are an excellent option for keeping chicken warm during outdoor events like picnics or potlucks.
To set up a chafing dish, light the fuel cells and place a rack over the dish.
Arrange the chicken pieces on the rack, making sure there is space between each piece to allow for even warming and to prevent sogginess.
Place a sheet of foil loosely over the top of the dish to protect the chicken from sparks and allow steam to escape.
A well-prepared chafing dish can keep 8-10 chicken pieces warm and ready to serve throughout your outdoor gathering.
5. Microwave

While microwaves are convenient for reheating, they can sometimes lead to soggy chicken.
Cover the chicken pieces with a slightly damp paper towel before placing them in the microwave to minimize this issue.
This will help absorb excess moisture and prevent the chicken from becoming too soft.
Set the microwave to low heat and reheat the chicken in 30 seconds to 1-minute intervals.
Monitor the chicken closely and check it frequently to avoid overcooking.
You can reheat your chicken in the microwave while preserving some of its crispiness using these techniques.
Tips for Maintaining Crispiness of Warm Chicken
1. Using Wire Racks for Even Heating
Wire racks are crucial for maintaining even heating and crispness when keeping your chicken warm.
The racks allow hot air to circulate the chicken from all sides, ensuring it warms up evenly without cold or soggy spots.
Additionally, wire racks keep the chicken elevated, preventing it from sitting in its moisture, which can quickly lead to a soft, unappealing texture.
Wire racks help preserve the chicken’s crispy exterior and juicy interior by promoting proper air circulation and moisture drainage.
For the best results when keeping your chicken warm in the oven, always place it on a wire rack set over a baking sheet.
2. Foiling

While foil is often used to cover food and retain moisture, it can also be employed strategically to prevent your chicken from becoming soggy.
Toward the end of the warming process, try loosely tenting the chicken with a piece of foil.
This helps trap some heat, keeping the chicken warm without exposing it to the oven’s high temperatures, which can cause over-browning or drying.
The loose tent also allows air circulation, preventing excess moisture buildup that could lead to sogginess.
Tenting your chicken with foil during the last 5-10 minutes of warming is an effective way to strike a balance between moisture retention and crispiness.
Timing for Adding and Removing Foil
Knowing when to add and remove the foil is key to keeping your chicken warm and crispy.
If you cover the chicken with foil too early in the warming process, you risk trapping too much moisture and steaming the chicken, resulting in a soft, soggy texture.
Instead, add the foil during the last third of the warming process.
For example, if you keep the chicken warm for 30 minutes, tent it with foil after the first 20 minutes.
This allows the chicken to warm up and the skin to crisp before adding the foil.
In the final few minutes of warming, remove the foil to allow excess moisture to escape and the skin to crisp up again.
By correctly timing foil, you can maintain the perfect balance of moisture and crispiness in your warm chicken.
After Cooking Tips for Chicken
Resting
Letting your chicken rest after cooking is essential for maintaining its juiciness and taste.
During the cooking process, the juices within the meat tend to move towards the center.
Allowing the cooked chicken to sit briefly gives these juices time to redistribute evenly throughout the meat.
This redistribution results in a more flavorful and moist final product. If you cut into the chicken too quickly after cooking, the juices will seep, leading to a drier texture.
Resting the chicken ensures that each bite is as juicy and delicious as possible.
Serving
Proper slicing techniques can greatly enhance the texture and tenderness of your cooked chicken.
One key tip is to slice against the grain, which means cutting perpendicular to the direction of the muscle fibers.
This technique effectively shortens the fibers, making the chicken more tender and easier to chew.
To identify the grain, look closely at the meat and locate the parallel lines running through it.
Once you’ve determined the grain’s direction, position your knife at a 90-degree angle and slice across those lines.
For bone-in pieces, cut the meat away from the bone, then slice it against the grain for a more enjoyable eating experience.
Conclusion
Keeping your chicken warm and delicious after cooking is achievable with the right techniques.
A conventional oven, toaster oven, slow cooker, or chafing dish can help you maintain your chicken’s optimal temperature and texture.
Remember to prioritize air circulation and moisture drainage to keep the skin crispy.
Proper resting times and slicing techniques can also enhance the juiciness and tenderness of the meat.
With attention to detail and simple tools, you can serve a warm, flavorful chicken dish that will impress your family and friends.
So go ahead and put these tips into practice, and enjoy the mouthwatering results of your perfectly warm and crispy chicken!


