Glitter in water. So simple. Every parent knows the struggle. Your child needs sensory play, but the toys in stores cost way too much.
You look at those fancy sensory bottles with their swirling colors and calming effects, then check the price tag and wince. It feels impossible to create quality sensory tools without breaking the bank.
But here’s something cool – you can make amazing sensory bottles at home for less than $5 each!
With just a few basic items from your kitchen or a quick dollar-store run, you can create custom bottles that work perfectly for your child’s needs.
I’ve made dozens of these with my kids and tested what actually works. In this guide, I’ll show you how to make sensory bottles beautifully and effectively that last – all while keeping your wallet happy.
What are Sensory Bottles, and Why Should You Make Them?
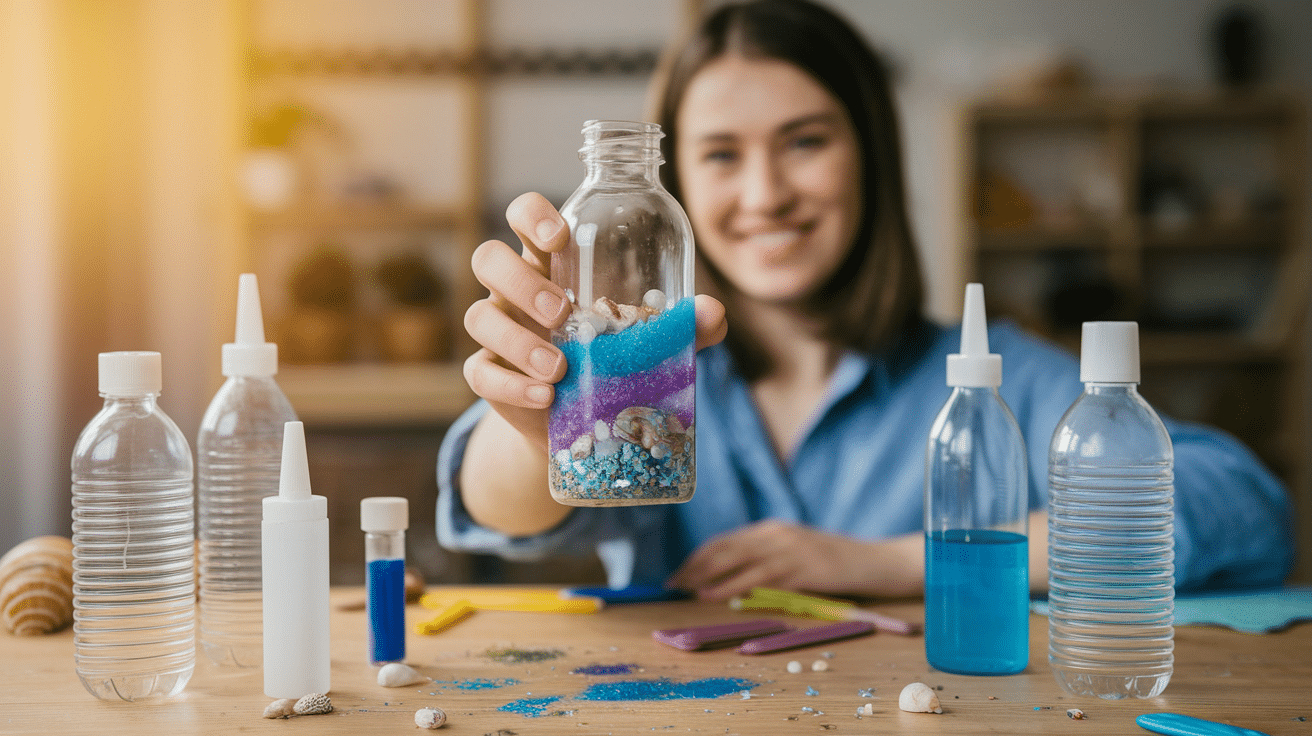
Sensory bottles are simple tools that help calm and focus both kids and adults. They’re clear bottles filled with water and other items like glitter, beads, or food coloring.
When you shake them, the items inside move in slow, gentle ways that catch your eye.
These bottles work because they give your brain something mild to focus on. Watching the items float and settle helps slow down racing thoughts. Many teachers, parents, and therapists use them to help with stress, anger, and focus issues.
Making your own sensory bottles saves you lots of money. Store-bought ones can cost $15-$30 each!
When you make them at home, you can create a whole set for the price of one store bottle. Plus, you can match them exactly to what you or your child likes.
Homemade bottles let you control what goes inside. You can make them with things your child already loves. They’re also great for kids who put toys in their mouths since the items stay sealed inside the bottle.
The best part? Doing them together turns into a fun activity that you and your kids will both enjoy!
Step-by-Step Guide to Creating Your Own Sensory Bottle
Making sensory bottles is a wonderful, relaxing activity for both children and adults. It’s not only a fun craft project but also a tool to help calm the mind and engage the senses.
Here’s a simple step-by-step guide to creating how to make sensory bottles using budget-friendly materials. Let’s get started!
1. Gather Your Tools and Materials

Before we begin, make sure you have everything you need. Here’s a simple list of materials and tools for creating your sensory bottle:
Essential Materials:
- Clear Plastic Bottle: Choose an 8-16 oz plastic bottle with a tight-fitting cap (make sure it’s lightweight and durable).
- Water: Use tap water as the base liquid for your sensory bottle.
- Food Coloring: A few drops of food coloring will add vibrant color to the water.
- Glitter: Fine or chunky glitter to add sparkle and visual movement inside the bottle.
- Sequins: Small shiny shapes (like stars or hearts) to add extra texture and visual interest.
- Water Beads: These beads expand when soaked in water and add a squishy tactile element.
- Vegetable Glycerin: Helps slow down the movement of glitter and beads, making them float more slowly.
- Small Toys/Objects (optional): Tiny toys, beads, or even Lego pieces to make your sensory bottle even more engaging. Ensure they fit through the bottle’s neck.
Tools:
- Funnel (optional): If you’re using small objects like beads, a funnel will help you pour them into the bottle easily.
- Measuring Spoon (optional): For accurately measuring the vegetable glycerin.
- Scissors (optional): If you need to trim any materials or labels.
2. Prepare the Bottle

Start with a clear plastic bottle. It’s safer and lighter than glass, making it perfect for kids to handle. Wash it thoroughly to remove any residue, and make sure it’s completely dry before use.
3. Add Water to Your Bottle

Fill the bottle about halfway with tap water. This will be the base of your sensory bottle. The amount of water you use can vary depending on how large or small you want your sensory bottle to be.
4. Color the Water

Add a few drops of food coloring to the water. Remember, a little goes a long way, so start with just a couple of drops.
You can always add more later if you want a deeper color. Shake the bottle gently to mix the color evenly with the water.
5. Add Glitter and Sequins

Now, it’s time to add some sparkle and texture! Choose glitter in your favorite colors and sprinkle it into the bottle. You can also add sequins or small shiny objects.
These add a fun, visual element and will float and swirl around in the water, making it even more mesmerizing. Don’t be afraid to add extra—you can never have too much glitter!
6. Incorporate Water Beads or Small Items

Next, add water beads to the bottle. They begin small and expand in water, making them perfect for sensory bottles.
If you don’t have water beads, you can use small toys like Lego pieces, buttons, or even beads for a fun touch. Just make sure the objects are small enough to fit through the bottle’s neck.
7. Add Vegetable Glycerin and Seal the Bottle

To make the contents of your sensory bottle move slowly, add a small amount of vegetable glycerin. It’s a thick, clear liquid that helps slow down the movement of the glitter and beads.
Once you’ve added the glycerin, fill the bottle almost to the top with more water. Screw the cap on tightly, and give the bottle a good shake. Now you have your very own sensory bottle!
Creative Customization Ideas for Your Sensory Bottles
Create a sensory bottle that’s both visually stunning and calming with these creative themes!
From glow-in-the-dark effects to under-the-sea wonders, these ideas offer a relaxing, multi-sensory experience for all ages.
1. Glow-in-the-Dark Sensory Bottle
- How to Customize: Add glow-in-the-dark paint or glow sticks to your bottle, creating a mesmerizing glow effect when the lights are turned off. This customization is perfect for nighttime calming or creating a relaxing atmosphere before bedtime.
- Why it’s Great: The glow-in-the-dark effect provides both a calming visual and a fun, magical element, making it perfect for children and adults alike.
2. Under the Sea Theme
- How to Customize: Use blue or turquoise water, small plastic fish, seashells, and starfish. Add iridescent or opalescent glitter to mimic the sparkle of water.
- Why it’s Great: The ocean theme is visually relaxing, and the colors and textures create a soothing underwater world. It’s a great sensory experience for kids who love sea life.
3. Rainbow Bottle
- How to Customize: Layer different colored water in your bottle to create a rainbow effect. Each layer should be separated by food coloring, creating distinct colors (red, orange, yellow, green, blue, indigo, violet). Add glitter to each layer for extra sparkle.
- Why it’s Great: The rainbow theme is vibrant, visually engaging, and creates a beautiful, calming effect. It’s especially appealing for children and can serve as both a sensory tool and a visual delight.
4. Space Exploration Theme
- How to Customize: Use dark blue or black water and add gold or silver glitter to simulate stars. Add small toy planets, rockets, or other space-themed items to enhance the galactic effect.
- Why it’s Great: The space theme is great for children who are interested in space exploration. The combination of dark water and sparkles creates a visually relaxing experience with a touch of wonder.
5. Calming Lavender Bottle
- How to Customize: Add lavender-scented oil or essential oils to the water (make sure it’s safe for skin contact). Add purple glitter, sequins, and small items that float slowly to create a soothing and fragrant sensory experience.
- Why it’s Great: Lavender is known for its calming properties, making this sensory bottle ideal for relaxation, stress reduction, or sleep promotion. The gentle fragrance combined with soothing movement creates a therapeutic effect.
6. DIY Snow Globe Sensory Bottle
- How to Customize: Add fake snow or white glitter into the bottle along with miniature winter figurines like snowmen, trees, or reindeer. Fill the bottle with water and seal it.
- Why it’s Great: This is perfect for creating a winter wonderland effect. The floating snowflakes or glitter add a calming visual element, and the winter theme makes it magical for all ages.
7. Textural Sensory Bottle
- How to Customize: Add a variety of textured materials, such as foam shapes, small rubber bands, pom-poms, or different types of beads (e.g., foam, plastic). The textures will move slowly, providing a tactile experience when shaken.
- Why it’s Great: This bottle combines tactile and visual sensations, providing a multi-sensory experience that helps improve focus, calm anxiety, or provide a soothing, hands-on activity.
Different Types of Sensory Bottles for Various Needs
Sensory bottles come in many forms. Each type serves a special purpose. Some help with calm, others with focus. Let’s look at the main kinds you can make at home.
Glitter Bottles
These have water, glue, and glitter. They move slowly when shaken. Kids call them “calm down bottles” because watching the glitter fall is very soothing.
Water Bead Bottles
Water beads grow in water and bounce around in bottles. They make fun sounds and move quickly. These are great for active play and catching attention.
Floating Object Bottles
You can add small toys, buttons, or craft items to bottles. Kids love finding hidden objects. These help with focus and can teach counting or colors.
Sound Bottles
Fill bottles with rice, beans, or small bells. Each makes different sounds when shaken. These help with hearing skills and music awareness.
Season Bottles
Make bottles with items from nature or holiday themes. Fall bottles might have orange glitter and leaf shapes. These connect kids to the changing world around them.
Troubleshooting Tips on How to Make Sensory Bottles Perfectly
1. Glitter Clumping Together
Tip: If the glitter clumps together, add more vegetable glycerin to slow down the movement. This helps glitter float evenly. You can also use finer glitter for a better flow.
2. Glitter or Beads Not Moving
Tip: If glitter or beads are not moving, increase the amount of vegetable glycerin to thicken the liquid. You can also try using clear liquid soap or baby oil for a slower flow.
3. Bottle Leaks
Tip: Make sure the cap is on tightly. If it’s still leaking, you can seal the cap with hot glue or strong adhesive to keep it secure.
4. Cloudy Water
Tip: If your water looks cloudy, try using distilled water instead of tap water. Also, consider using fine glitter, as it leaves less residue in the water.
5. Objects Sticking to the Sides
Tip: If objects like water beads or sequins are sticking to the sides, use clear glue or tape to secure them at the bottom. Adding more glycerin can also help keep the items floating.
6. Too Much or Too Little Movement
Tip: If things are moving too fast or too slow, adjust the amount of vegetable glycerin. More glycerin slows the movement, and less glycerin makes it move faster.
7. Water Beads Escaping
Tip: Water beads can bounce out of the bottle. Add them slowly and make sure the cap is tightly sealed. If they still escape, use smaller beads or less-soaked beads.
8. Bottle Color Too Dark or Light
Tip: If the color is too dark, add more water. If it’s too light, add a few more drops of food coloring. Shake gently and check before sealing the bottle.
The Bottom Line
Making sensory bottles at home puts calming, engaging tools within everyone’s reach. With just a few dollars and common household items, you’ve now got the know-how to make sensory bottles that work for any age or need.
Remember that the best sensory bottles match your child’s interests and growth stage. Start simple with glitter bottles, then try more complex designs as you gain confidence.
What will you try first? A calming glitter bottle for bedtime or a sound bottle for music play? The options are endless, and the benefits are real.
Share your creations with other parents and teachers. And don’t forget to let your child help with the process—it adds another layer of sensory learning and makes the final bottle even more special to them.


