Want to keep kids happily engaged while they learn? Spring sensory bin ideas offer the perfect solution.Many parents struggle to find activities that are both fun and educational during the spring months.
These simple-to-create play stations use everyday items to spark curiosity and build important skills.
This blog covers everything from age-appropriate bin ideas for babies through kindergarteners to budget-friendly materials you can find at home. Learn how spring sensory bins improve brain development, strengthen hand muscles, and teach about nature in a hands-on way.
Ready to change ordinary household items into special learning tools that will keep your child happy?
Learning Through Sensory Play
Spring sensory bins help children grow in many ways. Kids feel different textures, which helps their brain development.
When they pick up small objects, they build the hand muscles needed for writing later. As they play, children make up stories with the materials.
They also learn about plants, insects, and spring changes in a fun, natural way.
Spring sensory bins can also help kids calm down and feel relaxed. The soft items, like cotton or grass, can help them feel safe. Bright colors grab their attention and keep them focused longer.
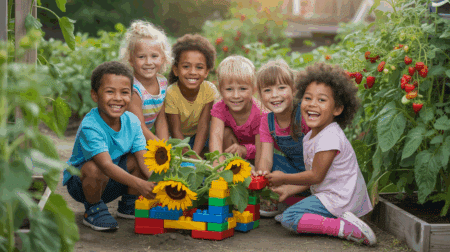
Children also build social skills. If two or more kids are playing together, they learn to take turns, share, and talk about what they’re doing. This helps their talking and listening skills.
Parents and teachers can change what’s inside the bin every week. One week can be about flowers, another about bugs, or even rain.
This keeps kids excited and ready to learn more. These bins can fit many needs: learning, play, and calm time all in one.
Sensory Bin Ideas by Age Group
Kids of different ages enjoy sensory play in various ways. Here, you’ll find age-appropriate ideas, from soft, safe bins for babies to hands-on learning activities for preschoolers and older children, making playtime fun and safe for everyone.
1. For Babies (Under 1 Year)

Babies get to know their world through touch and mouthing objects. Create sensory experiences with soft, washable materials that are safe if mouthed.
Fill a low container with satin ribbons, felt pieces, or clean scraps of different fabrics in spring colors. To prevent choking, make sure all items are larger than a toilet paper tube.
Water play works wonderfully for babies. Fill a shallow pan with an inch of water and add large floating flowers, plastic cups, and soft sponges in pastel colors.
Always supervise water play directly, staying within arm’s reach at all times.
2. For Toddlers (1–3 Years)

Toddlers love finding hidden treasures. Create a bug hunt bin using colored rice as a base with plastic insects hidden throughout.
Provide large plastic tweezers or scoops for finding and collecting the bugs. This builds fine motor skills while introducing spring creatures.
Color sorting engages toddlers’ developing categorization skills. Fill a bin with items in spring pastels – pink and yellow pom-poms, blue water beads, green felt strips.
Add small containers in matching colors and show your toddler how to sort items by color. This simple activity teaches colors while practicing picking up and placing objects.
3. For Preschoolers (3–5 Years)

Preschoolers enjoy imaginative play. Create a flower planting bin with green-dyed rice or split peas as soil. Add artificial flower stems, small pots, and plastic shovels.
Children can practice “planting” the flowers, arranging gardens, and caring for their plants.
A DIY garden bin extends the learning. Use brown rice for soil, add small watering cans, seed packets, craft stick plant markers, and small gardening gloves.
Include small baskets (use small plastic ones) so children can “harvest” vegetables. This play teaches plant growth concepts and garden vocabulary.
4. For Kindergarteners (5+ Years)

Older children grasp more complex concepts. To represent a pond, create a frog life cycle bin with blue water beads or blue-tinted water.
Add plastic models showing each stage: eggs, tadpoles, young frogs with tails, and adult frogs. Include plastic plants and stones to create pond habitats.
Counting games combine math and sensory play. Fill a bin with dried beans and hide numbered insects (1-20). Children search for the bugs and place them in numerical order.
Add small containers for counting specific numbers of beans or sorting them by type if using mixed varieties. This reinforces number recognition and counting skills.
Steps to Make a Spring Sensory Bin

Making a spring sensory bin is easy and fun. You only need a few simple items. This section shows you step-by-step how to put it all together.
Materials and Setup
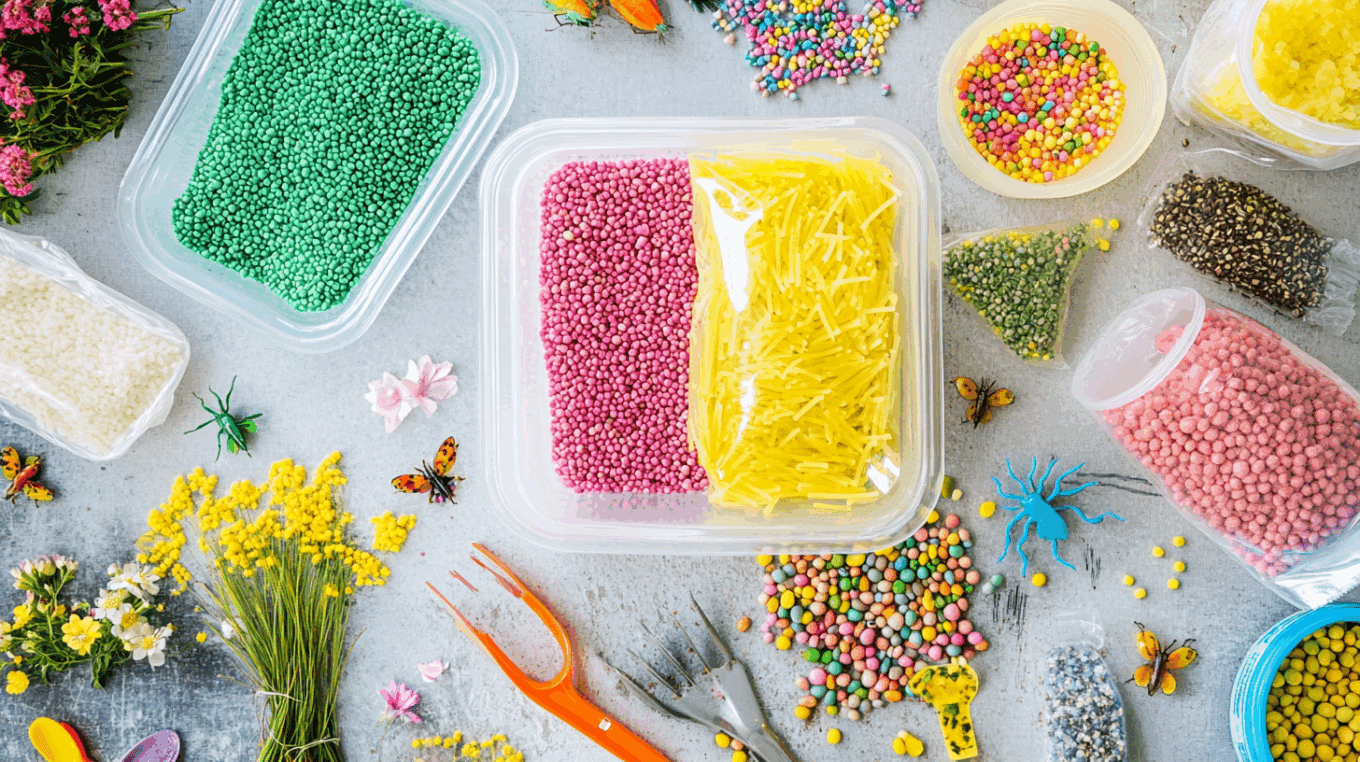
A spring sensory bin uses simple items to create a hands-on play space for children. Fill a container with bases like green rice, split peas, or water beads.
Add spring items such as toy bugs, small flowers, leaves, and mini garden tools. Include figures like bunnies and frogs.
Provide scoops, tongs, and small cups for children to use during play.
Step 1: Choosing Your Theme
Pick a theme that shows spring’s magic. Try “Garden Growth” with seeds and small plant toys. “Bug World” can use toy insects and leaves.
“Spring Animals” works well with chicks, bunnies, and lambs. “Weather Watch” might include blue water beads for rain and yellow items for sunshine.
Keep it simple – one clear theme helps children connect with spring.
Step 2: Coloring Your Base
Rice: Put 2 cups of rice in a zip bag. Add 1 tablespoon of vinegar and 5-10 drops of food coloring. Seal and shake until the color spreads. Spread on a baking sheet to dry (1-2 hours).
Pasta: Boil pasta, then mix with 1 teaspoon vinegar and food coloring in a bag. Shake and lay flat to dry.
Beans/Peas: Place in a bag with 1 part rubbing alcohol to 10 parts water and food coloring. Shake and dry on paper towels.
Water Beads: Soak in water per package directions. Add food coloring to the water while they grow.
Step 3: Layering and Arranging Items
Start with your colored base at the bottom of a plastic tub or bin. Create small hills and valleys for interest. Add larger items like toy flowers first, pushing stems into the base.
Scatter smaller items like bugs throughout. Make paths with pebbles or twigs. Hide some toys under the surface for finding.
Keep some empty spaces for children to fill during play.
Tips for Set Up and Play
Place the bin on a sheet or tablecloth for easy cleanup. Set clear rules about keeping materials in the bin. Sit with young children during the first play sessions.
Ask open questions, such as, “How does that feel?” or “What might this bug eat?” Rotate items weekly to keep interest high. Store themed items in labeled bags for quick changes.
Take photos before cleanup to remember good setups. When outside, natural items like sticks and flowers make a great addition.
Budget-Friendly Spring Sensory Bins
You don’t need to spend a lot to create exciting sensory bins. You’ll find smart and affordable ideas using common or recycled items, perfect for keeping kids entertained without going over your budget.
Dollar Store Finds
Spring sensory play doesn’t have to break the bank! Dollar stores are treasure troves for creating magical sensory experiences.
Look for colorful plastic containers to use as base bins, artificial flowers and grass, pastel-colored plastic eggs, small gardening tools, colorful rice or beans, and plastic insects and animals.
Pro tip: Grab a few extra containers to separate different sensory materials, making cleanup easier.
Upcycling Household Items
Change everyday items into exciting sensory exploration tools. Use leftover rice as a base, coloring it with food coloring and vinegar. Add plastic eggs, small toys, or measuring cups to create an engaging experience.
Old pasta can become a textural wonderland by mixing different shapes and colors and hiding small plastic toys for discovery.
Repurpose old kitchen containers to create water bead stations with spring-themed water bead mixes, plastic flowers, or small garden tools.
DIY Tools from Recycled Materials
Get creative with tools that cost nothing and spark your imagination. For example, you can cut the bottom off milk jugs to create scoops, or you can use large yogurt containers or cleaned shampoo bottles.
Make funnels from plastic water bottles or empty plastic containers. Use egg cartons for color sorting, muffin tins for organizing small items, and old colanders for an interesting pouring experience.
Advantages of Sensory Bins and How to Store Them
After playtime is over, it’s helpful to know how to clean, store, and refresh your sensory bins.
This section provides simple tips for maintaining the quality of your materials, as well as outlining their benefits, so that you can reuse them for future activities.
Benefits of Spring Sensory Bins
>Spring sensory bins help kids in many ways. They learn, play, and grow while having fun. This section shares how these bins help a child’s brain, hands, and feelings.
- Spring bins expose children to various textures, helping build neural connections.
- Small items require careful handling, strengthening the finger muscles needed for writing.
- Children create stories with bugs and flowers, boosting their imagination
- Hands-on exploration teaches about spring plants, insects, and weather
- Play connects learning with real-world experiences for better understanding
Storage and Maintenance Advice
>Keeping your sensory bin clean and ready is important. You don’t want it to get messy or smelly. This part gives easy tips to store and care for it properly.
- Clean natural materials with mild soap and water; dry completely to prevent mold
- Place plastic pieces in the top dishwasher rack for thorough cleaning
- Store in clear containers with secure lids, clearly labeled by season
- Replace spring items with summer themes, like beach objects, when the season changes
- Create fall bins with leaves and pine cones; winter bins with artificial snow.
Wrapping Up
Spring sensory bin ideas combine play with learning in ways children naturally enjoy. By setting up these simple activities, you’re helping your child develop touch awareness, hand coordination, and creative thinking skills.
Remember to match materials to your child’s age, clean items regularly, and store components in labeled containers for future use.
The beauty of spring sensory bins is their flexibility; you can create them with items from around your home or with inexpensive dollar-store finds. As seasons change, swap out spring items for summer, fall, or winter themes. Your child will thank you for these hands-on experiences that make learning feel like play.
For more such informative blogs, visit out website!


