Kids and adults alike stop scrolling when they see colorful, stretchy slime videos online.
The satisfaction of pulling, squishing, and playing with this gooey substance has turned many into slime fans. But buying pre-made slime can get costly.
Most people don’t know they can make various types of slime at home with simple items from their kitchen or local store.
Anyone can create these fun textures without special skills. From basic fluffy slime to crunchy versions that make satisfying sounds, homemade options save money and allow for personal touches.
Ready to try making slime at home? Here are different types of slime to start creating today.
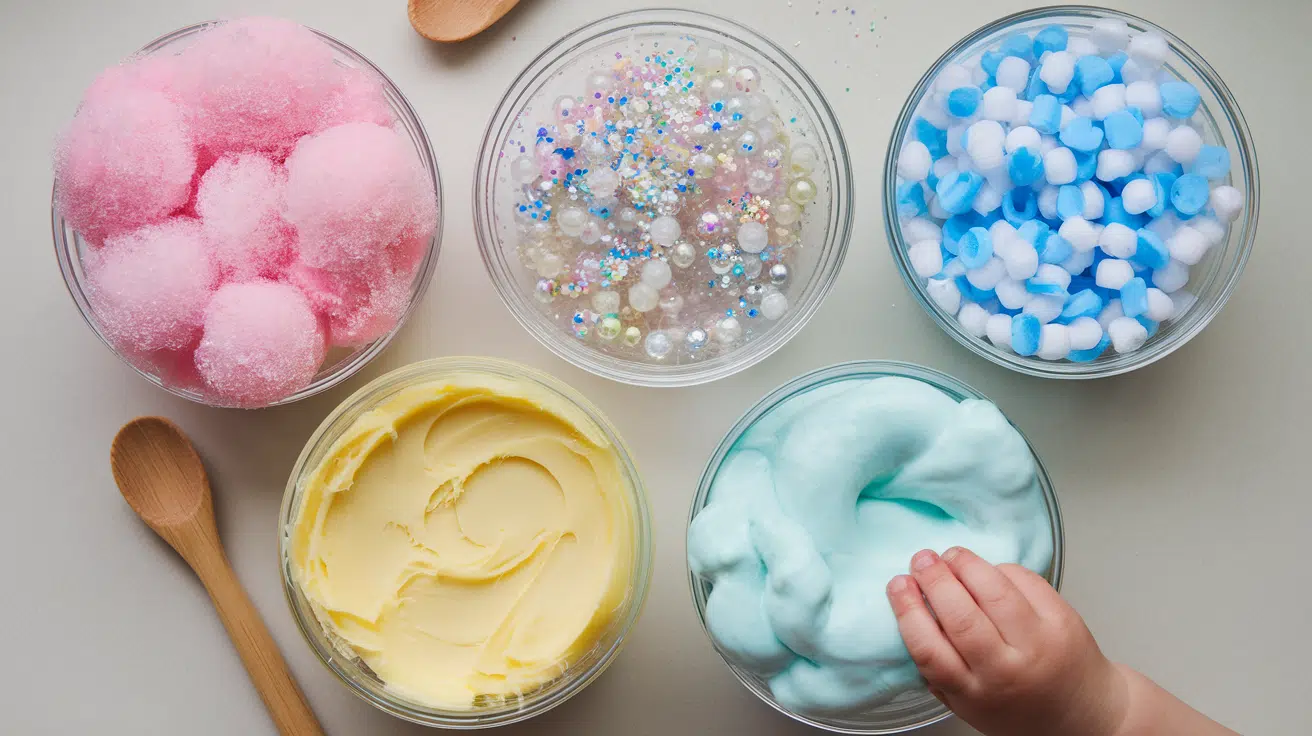
Understanding the Different Types of Slime
Not all slimes are created equal. Each type offers a unique feel, look, and play experience that appeals to different senses.
From silky smooth textures to crunchy bits that make noise, the world of homemade slime has something for everyone. Let’s look at the main types you can create in your kitchen today.
1. Cloud Slime

This light, puffy slime feels like touching a soft cloud. The secret ingredient is instant snow powder, which creates a texture that breaks apart when pulled slowly but stretches when pulled quickly.
How to make:
- White glue
- Baby oil
- Food coloring
- Baking soda
- Shaving cream
- Contact lens solution
- Instant snow powder
Mix glue, a few drops of baby oil, and food coloring in a bowl. Add a pinch of baking soda and a dollop of shaving cream. Stir in contact lens solution until slime forms, then knead in hydrated instant snow powder until the desired cloud-like texture appears.
Texture: Fluffy, airy, stretchy
2. Butter Slime

This creamy and spreadable slime looks like a thick, pillowy whipped topping. The addition of clay gives it a unique feel that’s satisfying to stretch and fold.
How to make:
- White glue
- Clay (usually Model Magic or air-dry clay)
- Slime activator (borax solution or contact lens solution)
- Food coloring (optional)
Mix the glue with a few drops of food coloring if desired. Add the slime activator slowly until the slime begins to form. Once it’s less sticky, work in small pieces of clay by kneading until you get a smooth, buttery consistency.
Texture: Smooth, buttery-like, stretchable, fluffy.
3. Crunchy Slime

This slime has a unique texture from added foam beads. When you squeeze it, it makes a fun popping sound that kids and adults find oddly pleasing.
How to make:
- Clear or white glue
- Slime activator
- Foam beads (also called floam or microbeads)
- Food coloring (optional)
Create a basic slime by mixing glue with activator until it reaches the right consistency. Add food coloring if desired. Once the slime is formed, fold in foam beads and keep mixing until they’re fully incorporated throughout the slime.
Texture: Textured, sizzly, crunchy.
4. Fluffy Slime

This light and airy slime is extra stretchable. The added shaving cream creates pockets of air that make the slime puff up nicely.
How to make:
- White glue
- Shaving cream (not gel)
- Slime activator
- Food coloring
Start by mixing glue with food coloring. Fold in a generous amount of shaving cream and mix well. Add activator bit by bit until the slime forms. The more shaving cream you add, the fluffier your slime will be.
Texture: Light, fluffy, airy.
5. Ice Slime

This slime feels like a slushy drink with a fizzy texture similar to snow. It’s cool to touch and has a unique sensation when played with.
How to make:
- Clear glue
- Baking soda
- Slime activator
- Fake snow powder
- Food coloring (optional)
Mix glue with a pinch of baking soda and food coloring if desired. Add activator slowly until slime forms. In a separate bowl, prepare fake snow according to package instructions. Combine the snow with your slime and knead until fully mixed.
Texture: Cool to the touch, moisture-packed, soft, and plush.
6. Glossy Slime

This slime has a smooth and shiny look that catches the light beautifully. It’s perfect for photos and videos.
How to make:
- Clear glue
- Food coloring
- Slime activator
- Baby oil (optional, for extra shine)
Mix clear glue with food coloring of your choice. Add activator bit by bit, stirring between additions, until slime forms. Once it’s no longer sticky, add a few drops of baby oil and knead it in for extra shine.
Texture: Thick, shiny, bubbly.
7. Clear Slime

This slime has a crystal-clear look that’s perfect for adding small toys or glitter to create a “fish bowl” effect. Making it truly clear requires patience.
How to make:
- Clear glue (PVA)
- Slime activator
- Hot water
Mix clear glue with a small amount of hot water. Add activator very slowly, stirring gently to avoid creating bubbles. Once formed, place in a clear container and let it sit undisturbed for several days to allow air bubbles to rise out.
Texture: Sticky, Bubbly
8. Jelly Slime

This slime has a gelatinous, playful texture that’s slightly sticky. It looks and feels somewhat like actual jelly and is very fun to poke.
How to make:
- Clear glue
- Food coloring
- Baby oil
- Baking soda
- Slime activator
Mix clear glue with food coloring. Add a pinch of baking soda and stir well. Add activator until slime forms, then knead in a few drops of baby oil to get that slick, jelly-like feel.
Texture: Bouncy, juicy, non-tacky.
9. Taste-Safe Slime

Made with edible ingredients, this slime is perfect for young children who might still put things in their mouth. Though edible, it’s meant for play, not eating.
How to make:
- Chia seeds or marshmallows (base depends on recipe choice)
- Water or cornstarch
- Food coloring (optional)
For chia seed slime: Mix 1/4 cup chia seeds with 2 cups water and food coloring. Let sit for 10 minutes until gel forms. For marshmallow slime: Microwave marshmallows with a bit of cornstarch until melted, then cool and knead.
Texture: Varies based on recipe (sticky, gooey, or stretchy).
Different Types of Slime: Which Ones Are Kid-Friendly?
Parents often wonder which slimes are safe for younger children. While all the slimes in this guide can be fun, some require more supervision than others.
The ingredients, texture, and difficulty level all play a role in determining if a slime type is right for your child’s age and abilities. Here’s a quick guide to help you choose.
| Slime Type | DIY Difficulty Level | Kid-Friendly |
|---|---|---|
| Cloud Slime | Beginner | Yes (5+ with supervision) |
| Butter Slime | Intermediate | Yes (7+ with supervision) |
| Crunchy Slime | Intermediate | Yes (5+ with supervision) |
| Fluffy Slime | Beginner | Yes (3+ with supervision) |
| Icee Slime | Intermediate | Yes (7+ with supervision) |
| Glossy Slime | Beginner | Yes (5+ with supervision) |
| Clear Slime | Advanced | No (10+ with supervision) |
| Jelly Slime | Intermediate | Yes (7+ with supervision) |
| Taste-Safe Slime | Beginner | Yes (1+ with supervision) |
How to Store Slime: Keep It Fresh and Stretchy
Proper storage is key to making your slime last longer. Good containers keep slime from drying out and help maintain its fun texture for weeks.
The main enemies of slime are air exposure and extreme temperatures, which can make it hard or sticky. With a few simple steps, you can keep your homemade creations fresh and ready to play with.
- Store slime in airtight containers like plastic food containers or zip-lock bags.
- Keep slime away from heat sources and direct sunlight.
- Add a few drops of water and knead if the slime begins to dry out.
- Place containers in a cool, dry spot like a drawer or cabinet.
- Wash your hands before playing to keep oils and dirt out of your slime.
- Label containers with the date made to track freshness.
- Separate different colors to prevent mixing and muddying.
Wrapping Up
Now you know about the different types of slime you can make at home! From cloud-like fluff to clear jelly, each variety offers unique textures and play experiences.
Making your own slime saves money and lets you control what goes into it, perfect for families with young kids or those with sensitive skin.
Remember to store your creations properly in airtight containers and keep them away from heat. If your slime gets sticky or hard, a few drops of water or activator solution can bring it back to life.
Slime isn’t just fun. It’s also great for sensory play, stress relief, and even fine motor skills. Why not try creating one of these recipes this weekend?
The ingredients are simple, and the joy of squishing homemade slime is worth the small effort.
What’s your favorite type of slime to make? Share your creations in the comments below! Have you discovered any special ingredients that make your slime extra special?
We’d love to hear your slime-making tips and see photos of your colorful creations!


