Parents and teachers often struggle to find simple, engaging activities that teach young children about science. Water experiments offer a perfect solution; they’re low-cost, easy to set up, and interesting for preschoolers.
These water-based science activities will transform ordinary moments into valuable learning opportunities. With basic household items and a bit of water, you can introduce complex scientific concepts in ways that small children can understand and enjoy.
This guide walks you through several kid-tested water experiments that spark curiosity and build early science skills. You’ll learn how to set up each activity, what materials you need, and the science concepts each one teaches.
Plus, you’ll find tips for guiding discussions that help children connect these fun experiments to the world around them.
Benefits of Water Experiments for Preschoolers
Water is a magical substance for young children. When they splash, pour, and play with it, they’re not just having fun; they’re exploring basic science concepts.
Early exposure to hands-on science creates a foundation for lifelong learning and curiosity.
- Safe exploration: Water is non-toxic and familiar, making it ideal for first science experiences
- Teaches cause and effect: Children see immediate results when they mix, pour, or freeze water
- Builds fine motor skills: Pouring, measuring, and transferring water helps small hand muscles grow stronger
- Introduces scientific vocabulary: Terms like “float,” “sink,” “dissolve,” and “freeze” become part of daily language
- Encourages questions: Water’s changing states spark natural curiosity and “why” questions
- Promotes problem-solving: Children test ideas and make predictions through play
- Budget-friendly: Requires minimal materials that most homes already have
- Easily adaptable: Activities can be made simpler or more complex based on a child’s age and interests
- Multi-sensory learning: Engages sight, touch, and sometimes even sound for complete learning
- Creates joy: Makes science fun and sets positive attitudes toward future learning
Top Preschool Science Experiments with Water
Water experiments offer preschoolers a hands-on way to grasp scientific concepts without complex explanations. When a child drops objects into water and sees some sink while others float, they’re learning about density and buoyancy.
The following are some science experiments with water for preschool kids:
1. Water Color Mixing Fun

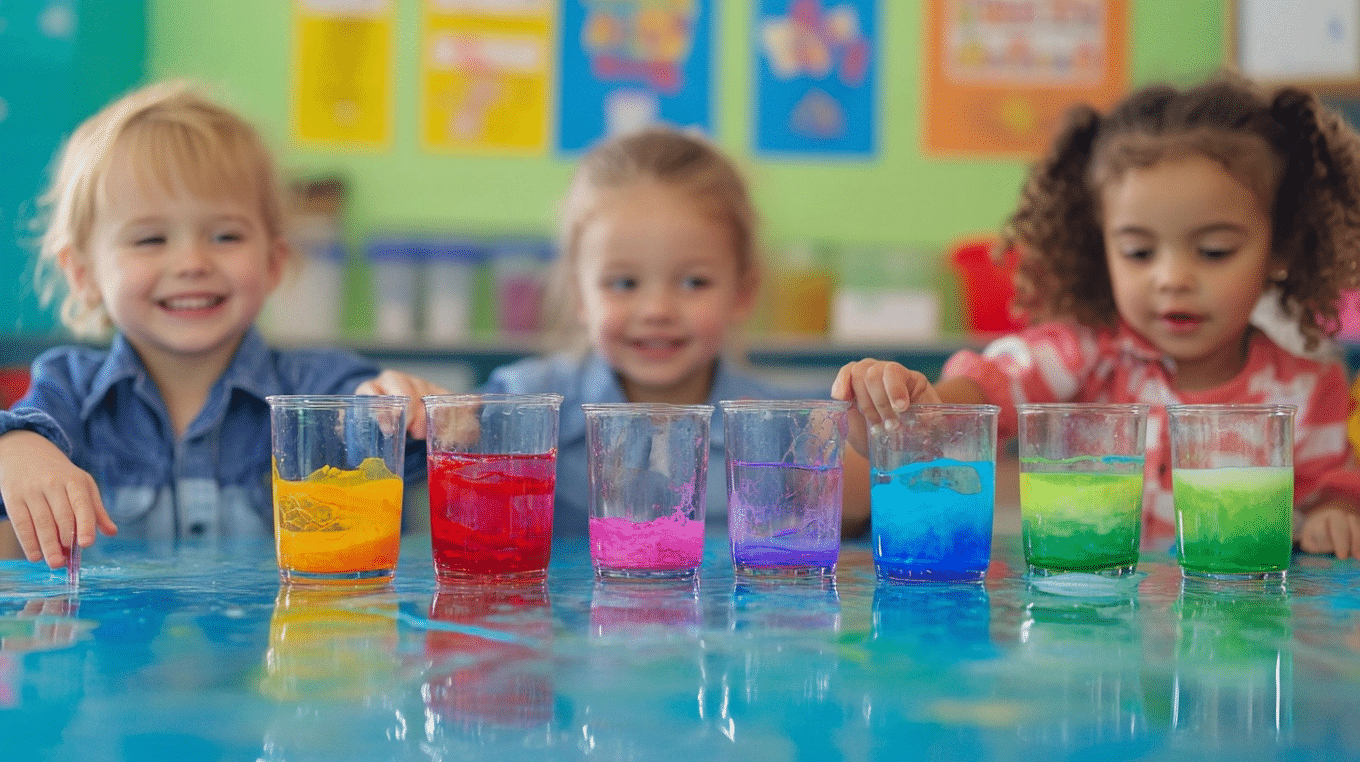
This simple and colorful experiment helps preschoolers understand the concept of mixing primary colors to create new ones. Using basic materials like food coloring, water, and clear cups, children can observe how colors blend and change when mixed.
This is a fun and educational way to introduce the basics of color theory and cause-and-effect relationships in an engaging, hands-on way.
Follow the below-mentioned steps to perform the experiment:
Step 1: Gather clear cups, primary-colored food coloring (red, yellow, blue), and water.
Step 2: Fill each cup halfway with water.
Step 3: Add a few drops of each primary food color into separate cups.
Step 4: Stir the colored water gently.
Step 5: Mix two different colors in a new cup to see what color forms.
Step 6: Repeat with other combinations to find more color blends.
Step 7: Discuss the results with the children.
2. Floating and Sinking Objects

This classic experiment helps children understand the basic principles of buoyancy.
They’ll learn about the density of objects and why some float on water while others sink. It encourages observation and hypothesis-making as they predict which objects will float or sink before testing them.
Follow the below-mentioned steps to perform the experiment:
Step 1: Fill a clear bowl or container with water.
Step 2: Gather a variety of small objects (e.g., paper clip, rubber ball, leaf, spoon).
Step 3: Ask the children to predict which objects will float and which will sink.
Step 4: Drop each object into the water one at a time.
Step 5: Observe whether the objects float or sink.
Step 6: Discuss why some objects float while others sink, explaining density.
3. Dancing Raisins in Soda

This fun experiment demonstrates how carbonation affects objects. The bubbles in soda attach to the rough surface of the raisins, making them rise and fall in the liquid. This experiment introduces children to concepts like gas bubbles, buoyancy, and motion in a playful way.
Follow the below-mentioned steps to perform the experiment:
Step 1: Fill a clear glass or container with a carbonated soda (like Sprite).
Step 2: Drop a few raisins into the soda.
Step 3: Watch as the raisins begin to rise and fall, dancing with the bubbles.
Step 4: Ask the children to observe and describe what happens to the raisins.
Step 5: Discuss the role of the bubbles in making the raisins move.
4. Water Cycle in a Bag

This experiment simulates the water cycle, allowing children to see how evaporation, condensation, and precipitation work. By using a simple plastic bag, water, and a marker, children can observe the water cycle up close, helping them understand this natural process in an engaging, visual way.
Follow the below-mentioned steps to perform the experiment:
Step 1: Fill a small plastic bag with water halfway.
Step 2: Seal the bag tightly and use tape to hang it on a window.
Step 3: Mark the starting water level on the bag with a marker.
Step 4: Place the bag in direct sunlight and wait for a few hours.
Step 5: Observe the water as it evaporates, forms condensation, and eventually “rains” back into the bag.
Step 6: Discuss the stages of the water cycle (evaporation, condensation, precipitation).
5. Ice Cube Melting Race

This exciting experiment allows children to observe how temperature affects the melting process.
By using ice cubes and comparing different methods of melting (such as using salt, warm water, and air), children can learn about heat transfer and the physical state changes of water.
Follow the below-mentioned steps to perform the experiment:
Step 1: Gather ice cubes, a tray, salt, warm water, and a fan (optional).
Step 2: Place one ice cube on a plate or tray.
Step 3: In the first race, sprinkle salt on the ice cube and observe.
Step 4: In the second race, pour warm water over the ice cube.
Step 5: In the third race, place the ice cube under a fan (if available).
Step 6: Watch which ice cube melts the fastest.
Step 7: Discuss why different methods melt the ice at different rates.
6. Magic Water Walking

This experiment is a fun way for preschoolers to see how water can “move” from one container to another using paper towels. It demonstrates capillary action and helps children understand how water travels through porous materials.
Follow the below-mentioned steps to perform the experiment:
Step 1: Gather 3 clear cups, water, food coloring, and paper towels.
Step 2: Fill the first and third cups with water and add different food colors.
Step 3: Cut the paper towels into strips and place one end in the first cup and the other in the third cup.
Step 4: Place the paper towel strip so that it connects the two cups.
Step 5: Watch as the water “walks” from one cup to the other through the towel.
Step 6: Discuss capillary action and why the water moves.
7. Rainbow in a Jar

This colorful experiment shows how liquids of different densities can layer on top of each other without mixing. Children will be amazed as they create a rainbow of colors by carefully layering liquids with different densities in a jar.
Follow the below-mentioned steps to perform the experiment:
Step 1: Gather honey, dish soap, water, vegetable oil, rubbing alcohol, food coloring, and a clear jar.
Step 2: Pour honey into the bottom of the jar.
Step 3: Slowly pour dish soap over the back of a spoon to create the second layer.
Step 4: Add colored water on top of the dish soap.
Step 5: Carefully add vegetable oil as the next layer.
Step 6: Finally, pour rubbing alcohol (colored if desired) to create the top layer.
Step 7: Observe the rainbow effect as the liquids stay separated.
8. Water and Oil Separation

This experiment helps children understand the concept of immiscibility the inability of oil and water to mix. By using a jar, oil, and water, they can see how the two liquids separate, providing a hands-on lesson about the properties of liquids.
Follow the below-mentioned steps to perform the experiment:
Step 1: Fill a clear jar halfway with water.
Step 2: Add a few tablespoons of vegetable oil to the jar.
Step 3: Close the jar and shake it vigorously.
Step 4: Observe what happens after the shaking stops.
Step 5: Discuss how the oil floats on top of the water, explaining that oil is less dense than water and doesn’t mix.
Step 6: Experiment with adding food coloring to the water to make the separation more noticeable
9. Water Tension Challenge

This experiment helps children find the concept of surface tension, the force that allows water to form droplets and enables some objects to float on the surface without sinking.
By using simple materials like a glass of water, a paperclip, and a dropper, preschoolers can observe how surface tension works.
Follow the below-mentioned steps to perform the experiment:
Step 1: Fill a clear glass with water.
Step 2: Carefully place a paper clip on the surface of the water.
Step 3: Observe how the paper clip floats due to water’s surface tension.
Step 4: Slowly add more water drops with a dropper onto the surface without spilling.
Step 5: Discuss why the paper clip floats and how surface tension allows water to hold the shape of the drops.
Step 6: Test the challenge by adding a small object like a pin and observe the difference in results.
10. Salt Water Density Test

This experiment introduces children to the concept of density by comparing the buoyancy of objects in fresh water versus salt water. By dissolving salt in water, children can observe how the water’s density changes and how it affects floating objects.
Follow the below-mentioned steps to perform the experiment:
Step 1: Fill two clear containers with equal amounts of water.
Step 2: In one container, dissolve several tablespoons of salt to create saltwater.
Step 3: Place an object, like an egg or fruit, into both containers.
Step 4: Observe which container allows the object to float and which doesn’t.
Step 5: Discuss how the salt increases the water’s density, making objects more likely to float.
Step 6: Experiment with adding more salt and observing the changes.
11. Lava Lamp Science Experiment

This fun experiment demonstrates the concept of density and how liquids of different densities interact. By using water, oil, and food coloring, children can observe how the liquids separate and how bubbles of colored water move through the oil, mimicking the effect of a lava lamp.
Follow the below-mentioned steps to perform the experiment:
Step 1: Fill a clear jar about three-quarters full with vegetable oil.
Step 2: Add water to fill the jar to about 90% full.
Step 3: Add a few drops of food coloring to the jar.
Step 4: Watch as the colored water drops through the oil.
Step 5: Add an effervescent tablet (like Alka-Seltzer) to the jar.
Step 6: Observe the bubbles forming and how the colored water moves through the oil like a lava lamp.
Step 7: Discuss how different densities of liquids cause this effect.
Tips for Making Water Science Experiments Engaging
Small hands learn big concepts when they play with this simple yet interesting substance. Parents can turn ordinary water play into extraordinary learning moments with just a few thoughtful approaches.
- Ask open-ended questions: “What do you think will happen if…?” prompts children to form their hypotheses.
- Use colorful materials: Add food coloring to make observations easier and more exciting for young eyes.
- Include familiar toys: Float their favorite plastic animals or action figures to maintain interest.
- Create a story: Frame the experiment as a trip or mission to solve a problem.
- Take photos: Document the process so children can see how things change from start to finish.
- Let them lead: Allow children to suggest variations or next steps in the experiment.
- Keep it simple: Focus on one concept at a time to avoid confusion.
- Use child-sized tools: Small pipettes, measuring cups, and funnels make children feel like real scientists.
- Try outdoor experiments: Moving water play outside allows for bigger splashes and easier cleanup.
- Connect to daily life: Help children see how the experiment relates to things they see every day, like rain or bath time.
Wrapping It Up
When children play with water, they’re not just having fun; they’re building scientific thinking skills. These simple experiments give preschoolers hands-on ways to learn about basic concepts while satisfying their natural curiosity.
Remember that the process matters more than perfect results. Some experiments might not work as planned, but these “failures” provide valuable learning moments, too.
Watch how your child responds, and follow their lead when they shows interest in specific aspects of water play.
Science doesn’t need complex equipment or fancy labs. It starts with questions, observations, and the joy of finding answers.
By introducing these water activities early, you’re helping your child develop a positive attitude toward science that may last throughout their school years and beyond.


