
Kids love to mold and shape things with their hands. Air-dry clay offers children a fun, mess-free way to express their creativity.
We know developing new ideas to keep kids engaged can be hard.
We’ve covered you with 40 exciting air dry clay ideas for kids. These ideas will spark your child’s imagination and provide hours of entertainment.
In this article, we’ll share easy-to-follow air dry clay ideas for kids suitable for various ages.
From simple shapes to more complex designs, you’ll find projects that delight and challenge your little artists.
Simple and Fun Air Dry Clay Ideas for Kids
1. Mermaid Eggs

Mermaid eggs are a fun and easy air-dry clay project for kids.
Shape the clay into egg forms, and once they dry, decorate them with glitter, paint, or small jewels to give them a magical touch.
These colorful eggs can be hidden around the house for kids to find or used to decorate their room. The simple project can spark kids’ creativity as they imagine different mermaid-themed designs.
It’s a fantastic project to keep kids engaged and imaginative!
- Materials required: Air-dry clay, glitter, paint, small jewels, and brushes.
For a more detailed guide, check the complete tutorial at adventure-in-a-box.
2. Unicorn Magnets

Unicorn magnets are a delightful project for kids who love magical creatures.
To make these, mold small unicorn shapes using air-dry clay, including a flat back for the magnet.
Once dry, paint the unicorn bright colors and add glitter or other decorations. Attach a small magnet to the back and stick it on the fridge. Kids will love seeing their creations on display!
This project adds charm to any fridge while boosting kids’ creative skills!
- Materials required: Air-dry clay, small magnets, paint, glitter, brushes, and glue.
For a more detailed guide, check the complete tutorial at gluedtomycraftsblog.com.
3. Dinosaur Fossils

Dinosaur fossils are a thrilling project for kids who love dinosaurs.
Start by rolling out air-dry clay into flat circles, then press toy dinosaurs into the clay to create realistic fossil imprints. Once the clay dries, kids can paint the fossils for an even more lifelike look.
This activity sparks imagination and allows kids to learn about prehistoric creatures in a fun, hands-on way.
It’s a perfect idea for budding paleontologists and curious kids alike!
- Materials required: Air-dry clay, toy dinosaurs, rolling pin, paint, and brushes.
For a more detailed guide, check the complete tutorial at discoveringmommyhood.com.
4. Leaf Imprints

Leaf imprints are a simple yet creative way to bring nature into your clay crafts.
Collect different types of leaves, roll out some air-dry clay, and press the leaves into the surface to create beautiful patterns.
Once dry, the clay can be painted to highlight the leaf designs. This activity connects kids to nature while teaching them about textures and patterns.
It’s an easy way to turn a walk in the park into a creative project!
- Materials required: Air-dry clay, leaves, rolling pin, paint, and brushes.
For a more detailed guide, check the complete tutorial at craftinvaders.co.uk.
5. Heart Trinket Dishes

Heart trinket dishes are a charming craft that lets kids make their little keepsake holders.
Roll out the air-dry clay and cut out heart shapes. Gently press the edges upward to form a small dish. Once dry, kids can paint the dish bright colors and add some glitter or jewels.
These make perfect gifts or personal items for holding jewelry or other small treasures.
It’s a wonderful project that combines creativity with functionality!
- Materials required: Air-dry clay, heart-shaped cookie cutter, paint, glitter, small jewels, and brushes.
For a more detailed guide, check the complete tutorial at daintydressdiaries.
6. Clay Bracelets

Clay bracelets are a fun way for kids to make their custom jewelry.
Roll small balls or beads from air-dry clay, then poke holes through the center using a toothpick. Once dry, the beads can be painted and strung together to form a bracelet.
Kids can mix different colors and patterns to make unique designs, giving them a great sense of accomplishment.
It’s an engaging project that lets kids show off their creativity in wearable form!
- Materials required: Air-dry clay, toothpick, paint, string, brushes.
For a more detailed guide, check the complete tutorial at montmarte.com.
7. Handprint Bowls

Handprint bowls are perfect air dry clay ideas for kids.
Roll out air-dry clay and have kids press their handprints into it. Cut around the hand shape and gently mold the edges upward to create a shallow bowl.
After the clay dries, the bowl can be painted or decorated. These bowls make great gifts for grandparents or as personal mementos.
It’s a memorable craft that creates a lasting reminder of little hands!
- Materials required: Air-dry clay, rolling pin, knife, paint, and brushes.
For a more detailed guide, check the complete tutorial at charlestonhomemaker.
Nature-Inspired Air Dry Clay Ideas for Kids
8. Flower Imprint Coasters

Flower imprint coasters are beautiful and nature-inspired air dry clay ideas for kids.
Roll out the air-dry clay into flat coaster shapes, then press fresh or dried flowers into the surface to leave delicate patterns.
After the clay dries, you can paint over the designs to make the flower details stand out. These coasters are perfect for adding a touch of the outdoors to your home decor.
It’s a creative way to preserve the beauty of flowers in a lasting form!
- Materials required: Air-dry clay, flowers, rolling pin, paint, and brushes.
For a more detailed guide, check the complete tutorial at cottageonbunkerhill.
9. Bird Nest with Eggs

Sculpting a bird’s nest with tiny eggs is a fun and detailed project for kids.
Start by rolling clay into small strands to form a nest shape, then roll smaller pieces into egg shapes to place inside. After drying, kids can paint the nest and eggs in natural or bright colors.
This project teaches kids about nature while letting them create their little wildlife pieces.
It’s a delightful idea that brings the charm of nature into playtime!
- Materials required: Air-dry clay, paint, and brushes.
For a more detailed guide, check the complete tutorial at safariltd.
10. Clay Butterflies

Clay butterflies are a colorful and imaginative project for kids.
Mold the air-dry clay into butterfly shapes, using tools or fingers to add texture to the wings. Once dry, paint the butterflies vibrant colors, adding details like spots or patterns.
These can be used as decorations or fun crafts to display around the house or garden.
It’s a joyful activity that lets kids’ creativity take flight!
- Materials required: Air-dry clay, butterfly-shaped cutter or freehand shaping, paint, and brushes.
For a more detailed guide, check the complete tutorial at woohoostorytime.
11. Clay Trees

Sculpting miniature clay trees is a wonderful way to introduce kids to nature-inspired art.
Roll the clay into a cone shape for the trunk and mold small branches to attach to it. Once the clay dries, kids can paint the trees in shades of green and brown.
These miniature trees can be used as decoration or as part of a larger clay landscape.
It’s a perfect project to bring the outdoors indoors!
- Materials required: Air-dry clay, paint, brushes, and clay tools (optional).
For a more detailed guide, check the complete tutorial at onelittleproject
12. Cactus Planters

Cactus planters are a creative and functional clay project.
Mold the air-dry clay into small planter shapes, leaving a hollow center for the cactus. Once the planters dry, paint them with fun patterns or textures.
These tiny planters can hold real or faux cacti, adding a fun decorative touch to any space.
It’s an ideal craft for kids who enjoy both art and gardening!
- Materials required: Air-dry clay, paint, brushes, small cacti or succulents.
For a more detailed guide, check the complete tutorial at noticingthehappy.
13. Seashell Creatures

Seashell Creatures is a fun mixed-media project in which kids combine clay and seashells to create imaginative ocean animals.
Start by molding the clay into different sea creature shapes, like crabs or fish, and then attach seashells for added texture and decoration.
Once the clay is dry, kids can paint their creations in bright colors. This project is great for bringing a beach vacation to life at home.
It’s an exciting way to make beach treasures even more special!
- Materials required: Air-dry clay, seashells, paint, brushes, glue.
For a more detailed guide, check the complete tutorial at JOOLIE.
14. Starfish Sculptures

Starfish sculptures are simple yet delightful clay air dry clay ideas for kids with a beachy vibe.
Roll out the air-dry clay and cut star-shaped figures. Use tools or a pencil to add texture to the arms of the starfish.
After drying, kids can paint them in vibrant or realistic colors, adding sea-themed fun to their creations.
It’s an enjoyable craft that brings the ocean indoors for kids to explore!
- Materials required: Air-dry clay, star-shaped cutter (or freehand), paint, brushes, and clay tools.
For a more detailed guide, check the complete tutorial at CraftyHarmony.
Festive and Holiday Air Dry Clay Ideas for Kids
15. Clay Ghosts

Clay ghosts are a spooky and fun Halloween project.
Roll out the air-dry clay into thin circles and drape them over small foil balls to create ghost shapes. Cut out the eyes and let the clay dry.
Once done, place a small LED light inside each ghost to make them glow eerily in the dark. These ghosts make great decorations for a haunted house setup or Halloween party.
It’s the perfect craft for kids who love a spooky touch!
- Materials required: Air-dry clay, foil, clay tools, LED lights, and paint (optional).
For a more detailed guide, check the complete tutorial at Apricot Polkadot.
16. Snowflake Ornaments

Snowflake ornaments are a festive clay project perfect for the holiday season.
Roll out the clay and use snowflake-shaped cutters to create ornaments. After drying, kids can decorate them with glitter or paint and hang them on the Christmas tree.
These handmade ornaments make great gifts or keepsakes to use year after year.
It’s a magical way to get into the holiday spirit!
- Materials required: Air-dry clay, snowflake cutters, glitter, paint, brushes, string or ribbon.
For a more detailed guide, check the complete tutorial at liagriffith.
17. Easter Bunny Figurines

Easter bunny figurines are an adorable craft for springtime.
Shape the air-dry clay into small bunnies, adding features like ears, eyes, and a fluffy tail. Once the clay dries, paint the bunnies with pastel colors.
These little figures are perfect for Easter displays or as gifts for family members.
It’s a fun and cute way to celebrate the Easter season!
- Materials required: Air-dry clay, paint, brushes, and clay tools (optional).
For a more detailed guide, check the complete tutorial at mysweetsavannah.com.
18. Pumpkin Sculptures

Pumpkin sculptures are a great way to enter the fall or Halloween spirit.
Mold the air-dry clay into small pumpkin shapes, adding texture by carving ridges around the sides. After drying, paint the pumpkins in traditional orange or get creative with fun colors.
These pumpkins can be used as fall decorations or centerpieces.
It’s a festive project to bring autumn to life!
- Materials required: Air-dry clay, paint, brushes, and clay tools.
For a more detailed guide, check the complete tutorial at Sculpd.
19. Clay Stars for Holiday Garlands

Clay stars for holiday garlands are a simple yet festive project.
Roll out the air-dry clay and cut star shapes using a cookie cutter. Once dry, string the stars together to make a garland to hang over the fireplace or around the Christmas tree.
Kids can also paint or decorate the stars with glitter for an extra sparkle.
It’s one of those wonderful air dry clay ideas for kids that brightens up any holiday decor!
- Materials required: Air-dry clay, star cutters, glitter, paint, brushes, string or ribbon.
For a more detailed guide, check the complete tutorial at chalkingupsuccess.
20. Clay Candy Canes

Clay candy canes are a fun and festive Christmas project.
Roll out two long red and white clay pieces, then twist them together to create a candy cane shape.
After the clay dries, these candy canes can be used as decorations or hung on the Christmas tree.
It’s a sweet way to add homemade charm to your holiday decorations!
- Materials required: Air-dry clay (red and white), clay tools, string, or ribbon.
For a more detailed guide, check the complete tutorial at clayhouseart.
21. Santa Claus Ornaments

Santa Claus ornaments are a delightful holiday project.
Sculpt small Santa figures out of air-dry clay, including details like his beard, hat, and coat. Once dry, paint the Santas with bright reds, whites, and blacks to bring the jolly character to life.
These ornaments make great tree decorations or gifts for family.
It’s a fun and festive way to spread Christmas cheer!
- Materials required: Air-dry clay, paint, brushes, clay tools, string or ribbon.
For a more detailed guide, check the complete tutorial at clayhouseart.
22. Clay Gift Tags
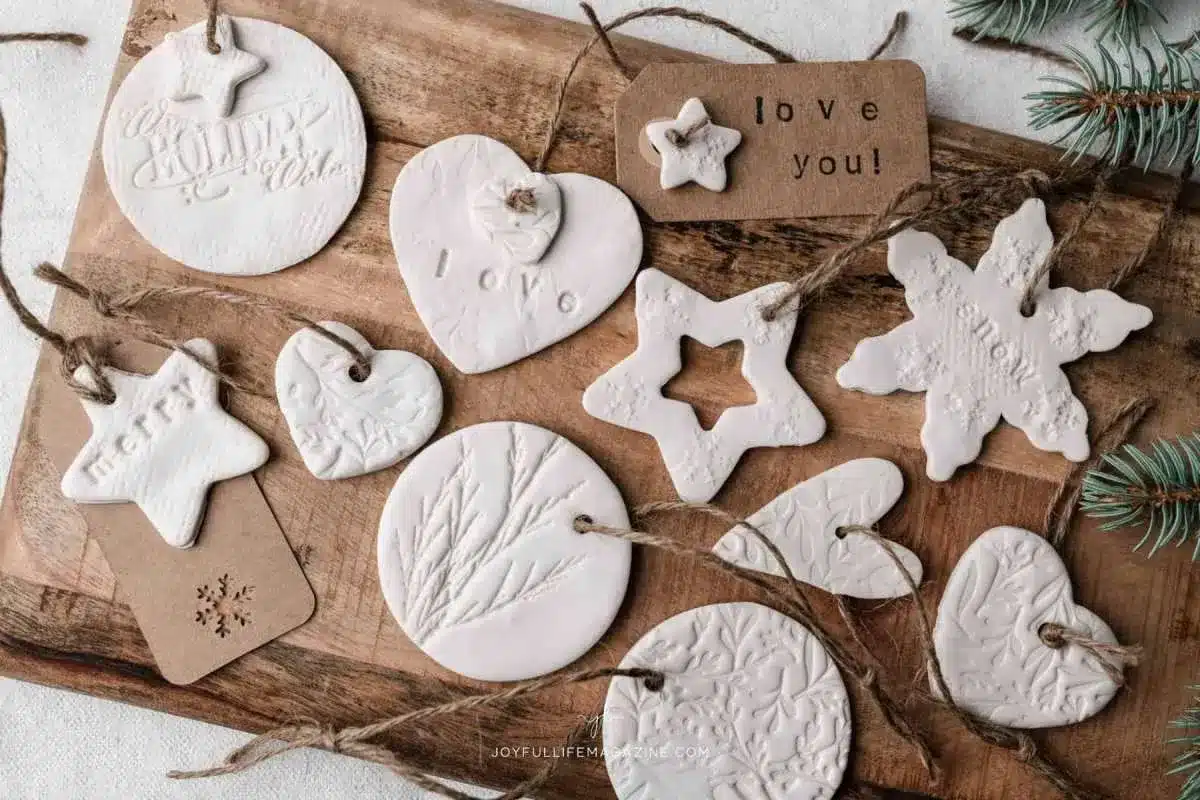
Clay gift tags are a personal and creative way to label holiday presents.
Roll out the clay and cut it into tag shapes, then use small stamps or tools to imprint names or designs. After drying, attach the tags to gifts with string or ribbon.
These tags add a homemade touch to any wrapped gift and can be kept as keepsakes.
It’s a thoughtful way to add a personal touch to gift-giving!
- Materials required: Air-dry clay, tag-shaped cutter, stamps or clay tools, string or ribbon, and paint (optional).
For a more detailed guide, check the complete tutorial at modern-glam.com.
Useful Air Dry Clay Ideas for Kids
23. Air-Dry Clay Alphabet Letters

Sculpting air-dry clay alphabet letters is a fun and educational project for kids. Roll out the clay and cut out letters using alphabet-shaped molds or freehand shapes.
Once the clay dries, kids can paint the letters in their favorite colors, use them to spell out names and phrases or decorate their rooms.
These letters can also be turned into wall art or personalized gifts.
It’s a creative way to combine learning and play!
- Materials required: Air-dry clay, alphabet molds (or freehand), paint, and brushes.
For a more detailed guide, check the complete tutorial at Active Creative Bees.
24. Clay Candle Holders

Clay candle holders are a functional and artistic project—mold air-dry clay into small, bowl-like shapes with an opening for a candle.
Kids can get creative by adding designs or patterns or pressing leaves or stamps into the clay for texture.
After drying, paint the holders to match your home decor or add a pop of color.
It’s a great way to mix creativity with practicality!
- Materials required: Air-dry clay, clay tools, paint, brushes, and candles.
For a more detailed guide, check the complete tutorial at stylist.co.uk.
25. Napkin Rings

Personalized napkin rings are an easy and fun air-dry clay project for kids.
Roll the clay into small tubes and join the ends to form a ring. Using stamps or clay tools, kids can then add patterns or initials.
Once dry, paint the rings to match the dining table theme or any holiday occasion. These rings add a special touch to family meals or festive dinners.
It’s a delightful project that makes mealtimes feel extra special!
- Materials required: Air-dry clay, clay tools or stamps, paint, and brushes.
For a more detailed guide, check the complete tutorial at gatheringbeauty.
26. Photo Frame Decorations

Decorating photo frames with air-dry clay is a creative way for kids to customize their keepsakes.
Mold small shapes like flowers, hearts, or stars and attach them to the frame using glue after the clay dries. Paint the shapes to match the frame, or add glitter for extra flair.
These frames make perfect gifts or personalized room decor.
It’s a lovely way to preserve memories while adding a personal touch!
- Materials required: Air-dry clay, photo frames, glue, paint, brushes, small molds, or freehand shapes.
For a more detailed guide, check the complete tutorial at Vivo Vintage Designs.
27. Clay Coasters

Clay coasters are a fun and functional project for kids.
Roll out the air-dry clay into round or square shapes, then use stamps or clay tools to add texture. Once dry, paint the coasters in bright colors or patterns to make them stand out.
These coasters protect surfaces while adding a homemade touch to any room.
It’s a perfect combination of art and practicality!
- Materials required: Air-dry clay, clay tools or stamps, paint, and brushes.
For a more detailed guide, check the complete tutorial at cottageonbunkerhill.
28. Geometric Pencil Holders

Geometric pencil holders are a stylish and useful craft.
Mold the air-dried clay into geometric shapes like cubes, hexagons, or cylinders. After drying, paint the holders in different colors or patterns to match the room.
These pencil holders are perfect for keeping desks organized and serve as decorative pieces.
It’s a fantastic way to mix creativity with organization!
- Materials required: Air-dry clay, clay tools, paint, and brushes.
For a more detailed guide, check the complete tutorial at Craftdil.
29. Clay Keychains

Creating clay keychains is a fun project for kids to make small, personalized accessories.
Mold the air-dry clay into various shapes, such as hearts, stars, or animals, then attach a keyring after the clay dries. Kids can paint the keychains in fun colors and patterns to make them unique.
These make great gifts or personal keepsakes.
It’s an easy way to create something small but meaningful!
- Materials required: Air-dry clay, keyrings, small molds or freehand shapes, paint, and brushes.
For a more detailed guide, check the complete tutorial at averageinspired.
Advanced and Creative Air Dry Clay Ideas for Kids
30. Clay Sunbursts

Clay sunbursts are a bright and cheerful project for wall decor. Shape the air-dry clay into round centers with long, thin rays extending outward.
Once dry, kids can paint the sunbursts in golden yellows or other vibrant colors to create a sunny effect.
These sunbursts can be hung on the wall for a fun decorative touch that adds warmth to any room.
It’s a creative way to bring a little sunshine indoors!
- Materials required: Air-dry clay, clay tools, paint, and brushes.
For a more detailed guide, check the complete tutorial at Flora_ Creations.
31. Dinosaur Egg Surprise

Dinosaur egg surprises are a fun project that adds an element of mystery.
Shape the air-dry clay into egg forms, hiding small dinosaur toys inside before closing them up. Once the eggs dry, kids can paint them to resemble real dinosaur eggs.
Later, they can break open the eggs to reveal the hidden toy. This activity is perfect for a fun egg hunt or a themed party.
It’s one of the fantastic air dry clay ideas for kids who love surprises and dinosaurs!
- Materials required: Air-dry clay, small dinosaur toys, paint, and brushes.
For a more detailed guide, check the complete tutorial at discoveringmommyhood.com
32. Mini Clay Monsters

Mini clay monsters are a fun and imaginative project for kids.
Sculpt air-dry clay into silly monster shapes with exaggerated features like big eyes, wild hair, and long arms.
Kids can make each monster unique with different expressions and paint them in bright or crazy colors once dry. These monsters are perfect for imaginative play or as desk buddies.
It’s a hilarious way for kids to express their wild creativity!
- Materials required: Air-dry clay, clay tools, paint, and brushes.
For a more detailed guide, check the complete tutorial at One Little Project.
33. Treasure Chest

A miniature treasure chest is a fun project that doubles as a small storage space.
Sculpt the air-dry clay into a box with a fitted lid, adding details like wood grain texture or little lock designs.
Once dry, kids can paint the chest to resemble old pirate treasure. This chest can store tiny treasures like jewelry, coins, or small keepsakes.
It’s a playful way to store special items in a custom creation!
- Materials required: Air-dry clay, clay tools, paint, and brushes.
For a more detailed guide, check the complete tutorial at Creative Paula.
34. Clay Rockets

Clay rockets are perfect for space enthusiasts.
Shape the air-dry clay into rocket forms, adding fins and windows. After the clay dries, kids can paint their rockets in bold colors like red, silver, or blue and add flames from the bottom.
These rockets make fun toys or decorations for a space-themed room.
It’s a creative project that’s out of this world!
- Materials required: Air-dry clay, paint, brushes, and clay tools.
For a more detailed guide, check the complete tutorial at kiwico.com.
35. Clay Fish Aquarium

A clay fish aquarium is a fun and interactive project where kids can create underwater scenes.
Sculpt small fish, plants, and coral from air-dry clay and place them inside a small box or frame. Paint the fish and plants bright colors to make the aquarium come to life.
This makes great decorations for kids’ rooms.
It’s fun to bring the ocean into the home without real water!
- Materials required: Air-dry clay, small box or frame, paint, brushes.
For a more detailed guide, check the complete tutorial at Krishna Art & Craft.
36. Clay Rainbows

Clay rainbows are colorful and cheerful crafts that can brighten any window.
Mold the air-dry clay into rainbow arches, separating the different color sections. After the clay dries, paint each arch in bright rainbow colors.
These rainbows can be hung in windows to catch the light or used as room decorations.
It’s one of the bright and happy air dry clay ideas for kids that adds color to any space!
- Materials required: Air-dry clay, paint, and brushes.
For a more detailed guide, check the complete tutorial at fallfordiy.
37. Clay Robots

Clay robots are a fantastic way for kids to explore their creativity.
Shape air-dry clay into fun, futuristic robot forms, adding details like gears, antennas, or buttons. Once dry, paint the robots metallic colors like silver, gold, or copper.
These robots can be used as toys or decorations and are sure to inspire imaginative play.
It’s a fun project for kids who love to invent and build!
- Materials required: Air-dry clay, clay tools, paint, and brushes.
For a more detailed guide, check the complete tutorial at DIY Crafty.
38. Clay Wind Chimes

Clay wind chimes are a musical and decorative project.
Mold air-dry clay into shapes like circles, stars, or hearts, then punch a hole in each shape before it dries. After painting the shapes, string them together and hang the chimes outside where they can catch the wind.
The soft sound of the clay chimes adds a relaxing element to any garden or porch.
It’s a soothing way to combine art and sound!
- Materials required: Air-dry clay, string, paint, brushes, and clay tools.
For a more detailed guide, check the complete tutorial at meandmyinklings.
39. Fingerprint Jewelry

Fingerprint jewelry is a sentimental and personal project.
Roll out small air-dry clay pieces and press a fingerprint into each piece to create a pendant or charm. After the clay dries, paint the pieces and add a string or chain to wear them as necklaces or keychains.
These make lovely gifts for family members.
It’s a meaningful craft that captures a personal touch!
- Materials required: Air-dry clay, paint, brushes, string or chain.
For a more detailed guide, check the complete tutorial at MadeByMarzipan.
40. Miniature Clay Houses

Miniature clay houses are charming projects that allow kids to create their little villages.
Mold the air-dry clay into small house shapes, adding windows, doors, and roofs. Once dry, paint the houses in fun or realistic colors.
These mini houses can be displayed on shelves or used for imaginative play.
It’s a delightful project that encourages imaginative storytelling!
- Materials required: Air-dry clay, paint, brushes, and clay tools.
For a more detailed guide, check the complete tutorial at eytozee.com.
Summing It Up
Air-dry clay opens up a world of creative possibilities for children.
These 39+ air dry clay ideas for kids are just the start. Each project helps kids develop fine motor skills, patience, and artistic expression.
Remember, the joy is in the process, not just the result. Please encourage your children to experiment and make each creation their own.
Don’t worry if things don’t turn out perfectly – that’s part of the learning experience.
Why not pick a project and start creating today? You might be surprised by what your little ones can make. And who knows, you might join in the fun, too!
We’d love to hear about your air clay adventures. Share your kids’ creations in the comments below!


