
Have you ever seen milk turn into a swirling rainbow right before your eyes? Kids often lose interest in science when it seems too complex.
But what if they could watch colors dance and spread across milk with just a few simple household items?
This magic milk experiment combines basic science with beautiful color patterns that will keep children engaged for hours. When food coloring meets dish soap and milk, an interesting chemical reaction happens that looks like magic but teaches real scientific concepts.
You’ll learn how to set up this experiment in minutes, understand the science behind it, and find ways to extend the learning. Get ready to watch your children’s faces light up as they become little scientists with this simple yet intriguing milk experiment.
What is the Magic Milk Experiment?

The magic milk experiment is a simple science activity where food coloring, milk, and dish soap create a colorful display of movement.
When you place drops of food coloring on the surface of milk and add a small amount of dish soap, the colors begin to move and mix in patterns that look magical to children.
This experiment works because of the interaction between fat molecules in the milk and the soap. Dish soap breaks down the fat in milk, causing the food coloring to spread out. The whole process takes just minutes to set up but can provide long moments of intrigue.
Children can watch how the colors move, change, and blend together. It’s not just fun to look at, it’s also a hands-on way to introduce kids to concepts like surface tension, molecular interactions, and chemical reactions.
Science Behind the Magic Milk Experiment Explained

When food coloring sits on milk, it floats on top because it’s less dense than the liquid below. The real magic starts when dish soap enters the picture.
Soap molecules have two different ends – one that likes water (hydrophilic) and one that likes fat (hydrophobic). Milk contains water, proteins, and fat molecules all mixed together.
When soap touches the milk, the soap molecules race to attach their fat-loving ends to the milk fat molecules. This creates a rapid movement throughout the liquid as the soap spreads out looking for fat. The food coloring gets carried along in this molecular chase, creating the swirling patterns you see.
This reaction continues until the soap molecules have attached to all available fat molecules in the milk, which is why the movement eventually slows down and stops.
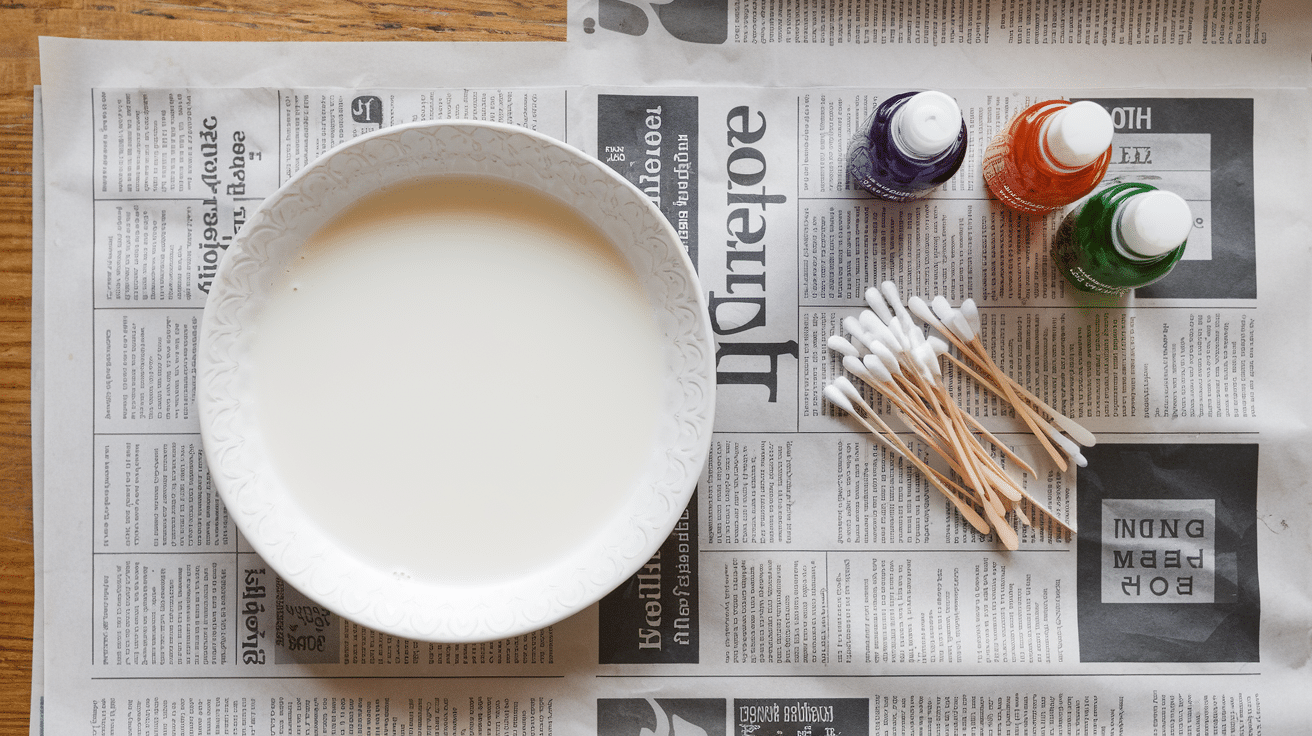
Materials Needed for The Magic Milk Experiment
Here’s everything you’ll need to create this colorful science experiment with items you probably already have at home:
| Material | Purpose |
|---|---|
| Whole milk | Works best due to higher fat content |
| Shallow dish or plate | Serves as the container for the milk |
| Food coloring (different colors) | Creates the visible color patterns |
| Dish soap | Acts as the catalyst for the reaction |
| Cotton swabs or toothpicks | Used to apply the dish soap |
| Eyedropper (optional) | Helps with precise color placement |
| Paper towels | Useful for cleanup |
Gather these simple materials before you start, and you’ll be all set to watch the magic happen right on your kitchen table.
Magic Milk Experiment: A Fun Science How-To
Follow these five simple steps to create a magical color show that will amaze children while teaching them about science concepts:
Step 1: Prepare Your Work Area
Pour whole milk into a shallow dish or plate until it covers the bottom with about 1/4 inch of milk.
Make sure the milk is at room temperature for the best results. Choose a spot where spills won’t be a problem, and lay down some paper towels just in case.
The experiment works with any type of milk, but whole milk creates the most dramatic effect because it has more fat content. Let the milk settle for a minute before moving to the next step.
Step 2: Add the Food Coloring

Here’s how to add the colors that will create the magical effect:
- Place 4-6 drops of different food colors onto the milk’s surface.
- Space the drops apart from each other around the plate.
- Try not to disturb the milk as you add the colors.
- Keep the drops small and focused in different spots.
- Use at least 3 different colors for the best visual effect.
- Let the drops sit on the surface without mixing them.
At this point, the colors should be sitting still on top of the milk, looking like bright dots on a white background.
Step 3: Prepare the Soap Applicator

Now we need to get our soap ready to create the magic. Dip one end of a cotton swab into dish soap.
- Make sure the cotton tip gets coated with soap, but not dripping wet.
- A small amount of soap works best – don’t oversaturate.
- Regular dish soap from your kitchen works perfectly.
The soap is the key ingredient that causes the chemical reaction. It acts as a surfactant, which means it can break down the milk’s fat molecules. When this happens, the food coloring moves with the milk, creating the swirling patterns we’re about to see.
Step 4: Touch the Milk and Watch the Magic

Get ready for the exciting part where the real magic happens:
- Gently touch the soap-dipped cotton swab to the surface of the milk.
- Place and hold the swab in the center of the dish first.
- Try touching different areas of the milk where colors are
- Observe how the colors move away from where the swab touches.
- Notice the swirling, mixing, and changing patterns that form.
The reaction should start immediately, with colors racing away from the soap in a burst of movement that looks almost alive.
Step 5: Experiment with Different Variations

Once you’ve mastered the basic technique, try changing things up.
Use different types of milk to see how the fat content affects the reaction – compare whole milk, 2%, 1%, and skim milk. You might notice that whole milk creates the most dramatic effect due to its higher fat content.
Add more soap to see how long you can keep the reaction going, or try different shapes of dishes. Let kids make predictions about what will happen with each change, then test their ideas. This turns a simple activity into a true scientific experiment with variables and observations.
This easy experiment provides a perfect blend of science and art that will keep kids entertained while they learn about chemical reactions in an engaging way.
For a more detailed tutorial on how to carry out the magic milk experiment, check out the video below:
Must-Try Creative Variations of The Magic Milk Experiment
Here are five ways to take your milk experiment to new levels with simple tweaks that add more learning fun.
1. Temperature Test: Try the experiment with cold milk straight from the fridge, then with room temperature milk. Watch how the colors move at different speeds. Warmer milk often creates faster reactions because the fat molecules move more freely when they’re not cold.
2. Milk Fat Comparison: Set up multiple plates with different types of milk- whole milk, 2%, 1%, and skim. Add colors and soap to each at the same time and notice how the fat content affects the swirling patterns and how long they last.
3. Color Theory Lesson: Use only primary colors (red, blue, yellow) and place them in specific patterns. Watch how they mix to create secondary colors as they swirl together. This adds an art lesson to your science experiment.
4. Shape Shifters: Instead of round dishes, try using different shaped containers. Square containers, oval plates, or even ice cube trays can change how the colors move and interact with each other.
5. Paper Pattern Capture: Float a piece of plain white paper gently on top of the milk after the colors have swirled. The paper will pick up the pattern like a print, creating a keepsake artwork of the experiment.
These simple changes turn one basic experiment into many learning chances for curious young minds.
Wrapping It Up
This milk experiment offers more than just swirling colors and fun. It introduces children to scientific concepts through play and observation.
The simple activity shows how everyday items can teach valuable lessons about chemistry and molecular interactions. When children watch colors dance across milk, they’re actually seeing science in action; something that textbooks alone can’t provide.
The experiment works with items already found in most kitchens, making it perfect for rainy days or quick science lessons at home. Each variation builds different skills while keeping the excitement fresh.
Why not try this experiment today? Take photos of your results and share them online with #MilkMagicScience. Or better yet, invite friends over for a milk science party and compare results.
Your kitchen can become a laboratory where learning feels like play.


